I absolutely adore sharing this Buttery Stovetop Biscuits Recipe because it has won me over with its incredible flavor and simplicity. The biscuits come out tender, flaky, and with just the right amount of buttery richness that fills the kitchen with the most irresistible aroma. Cooking these on the stovetop instead of baking means you can have warm, fresh biscuits ready in under half an hour without turning on the oven, which is such a game changer in my kitchen. I promise, once you try this recipe, these biscuits will become a beloved staple in your home too.
Why You’ll Love This Buttery Stovetop Biscuits Recipe
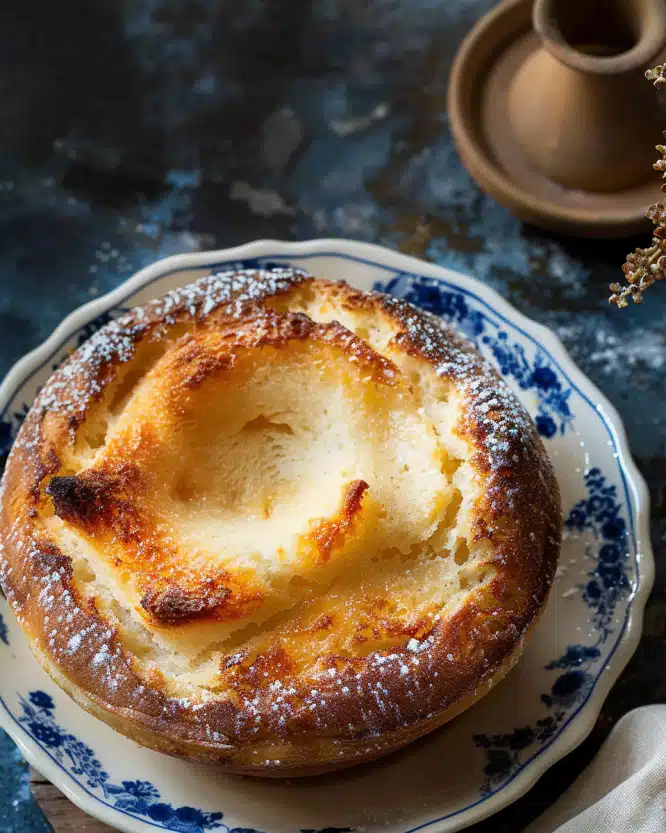
From the very first time I made this recipe, I was hooked on the flavor. These biscuits have a beautiful buttery taste that’s perfectly balanced by the tanginess of buttermilk, giving them a cozy, comforting flavor that’s both nostalgic and fresh. The slight golden crust formed in the skillet makes every bite a little crispy on the outside, yet soft and fluffy inside, which is exactly what I want in a biscuit. It’s the kind of texture that keeps me sneaking just one more.
What really excites me about this Buttery Stovetop Biscuits Recipe is how incredibly easy it is to prepare. With just a handful of simple ingredients and straightforward steps, I’m able to have fresh biscuits without firing up the oven, which saves both time and heat, especially during warm days. I find these biscuits perfect for weekend brunches, weeknight dinners, or even casual gatherings — they pair beautifully with everything from honey butter and jam to savory gravies or soups. Honestly, this recipe stands out for how effortlessly delicious and versatile it is.
Ingredients You’ll Need

The ingredients for this recipe are refreshingly simple, yet each one plays a crucial role in creating those tender, flaky biscuits I love. From flour that forms the base to cold butter that creates delicate layers, every component works together to deliver that classic biscuit texture and flavor.
- 2 cups all-purpose flour: Provides the perfect structure for soft, fluffy biscuits.
- 1 tablespoon baking powder: Gives the biscuits a good rise without overpowering the taste.
- 1/4 teaspoon baking soda: Adds a slight lift and helps the biscuits brown beautifully.
- 1 teaspoon salt: Enhances flavor and balances the richness of the butter.
- 5 tablespoons unsalted butter, cold plus extra for greasing the pan: Cold butter is key to flaky layers, and extra butter for cooking adds that delicious crust.
- 1 cup buttermilk: Adds moisture, a subtle tang, and tenderizes the dough.
Directions
Step 1: In a mixing bowl, whisk together the flour, baking powder, baking soda, and salt until well combined and free of clumps. If you prefer, you can pulse these dry ingredients in a food processor just a few times for an even mix.
Step 2: Grate the cold butter using the large side of a box grater directly into the flour mixture. Toss everything together gently so the butter pieces stay as little nuggets throughout the flour. Alternatively, you can use a pastry cutter or pulse in the food processor until the butter resembles peas. If done in the processor, transfer the mixture to a large bowl now.
Step 3: Create a well in the center of your dry mixture and pour in the buttermilk. Using a spoon or your hand, gently stir just until combined. The dough will be somewhat shaggy and sticky, which is perfect. Pour the dough out onto a lightly floured surface to proceed to shaping.
Step 4: Lightly flour your hands and pat the dough into a large rectangle about 10-12 inches wide and 3/4 inch thick. Keep extra flour close by as you will need it to keep the dough from sticking. Now fold the dough in half, rotate it 90 degrees, and pat back into a rectangle. Repeat this folding and patting process four more times (five folds total). This technique builds layers without overworking the dough.
Step 5: Using a 2.5 to 3-inch biscuit cutter, carefully cut biscuits from the dough without twisting the cutter — this keeps the edges light and flaky. Gather leftover scraps gently and keep cutting until all dough is used, making about 10 biscuits total.
Step 6: Heat a 10-inch skillet (a cast iron skillet is my favorite here) over medium-low to low heat and melt a tablespoon of butter. Place the biscuits about an inch apart in the skillet. Cook each batch for 6 minutes per side, adjusting the heat to prevent burning; low and slow is best here for fluffy centers and golden crusts. Add another tablespoon of butter when cooking subsequent batches.
Servings and Timing
This recipe yields about 10 delicious biscuits, perfect for a family breakfast or sharing at a brunch party. Preparation time is roughly 10 minutes, with about 15 minutes of cooking time on the stovetop. Altogether, you’re looking at just 27 minutes from start to finish, with no additional resting time required. It’s a quick way to have fresh-baked goodness anytime you want.
How to Serve This Buttery Stovetop Biscuits Recipe

When I serve these biscuits, I love presenting them warm right out of the pan because that buttery aroma is so inviting. They pair incredibly well with sweet accompaniments like honey, maple syrup, or homemade jam which complement their rich flavor without overpowering it. For a savory option, I often serve them alongside scrambled eggs, sausage gravy, or a hearty bowl of chicken soup — the biscuits are perfect for dipping and soaking up all those extra flavors.
For garnishing and plating, a simple garnish of fresh herbs like chopped chives or parsley adds a pop of color and freshness to the plate, especially when paired with breakfast spreads or soups. And for beverages, I’ve found that a light-bodied white wine or a sparkling rosé beautifully balances the buttery richness, while a cold glass of fresh orange juice or a creamy latte feels just right for morning meals. These biscuits are my go-to for family dinners, holiday brunches, or casual weekend gatherings — they always bring a little extra joy to the table.
If you have guests coming over, try stacking the biscuits on a platter lined with a cozy cloth napkin to keep them warm and inviting. I usually recommend serving them hot or warm because that’s when they’re at their fluffiest and most fragrant, but they also hold up nicely at room temperature if your meal stretches a bit longer.
Variations
I enjoy experimenting with this Buttery Stovetop Biscuits Recipe by tweaking ingredients and techniques to suit different tastes or dietary needs. For instance, swapping half of the all-purpose flour for whole wheat adds a nutty flavor and a bit more fiber without greatly sacrificing tenderness. You could also add herbs like rosemary or thyme to the dough for a fragrant savory twist. A sprinkle of shredded cheese or a pinch of garlic powder can bring another layer of deliciousness if you’re feeling adventurous.
If you need this recipe to be gluten-free, I suggest using a high-quality gluten-free flour blend designed for baking, and adding a bit more baking powder to help with rise. Vegan modifications can be done by replacing butter with coconut oil or a plant-based butter and substituting buttermilk with a mixture of plant milk and lemon juice or vinegar as a tangy alternative.
While stovetop is my favorite method for these biscuits, you can also bake them if that’s your preference — bake at 425°F for about 12-15 minutes until golden. This method offers a slightly different texture, but just as delightful. Each variation invites you to make this recipe your own while still enjoying those familiar buttery layers I cherish.
Storage and Reheating
Storing Leftovers
Leftover biscuits store beautifully in an airtight container or resealable plastic bag at room temperature for up to two days. If you want to keep them fresher longer, placing them in the refrigerator can extend their life by a day or two, but I find that refrigeration can sometimes dry them out a bit if left uncovered. Always make sure the biscuits are completely cooled before storing to avoid condensation.
Freezing
These biscuits freeze wonderfully, making them perfect for prepping ahead. To freeze, let them cool completely, then wrap each biscuit individually in plastic wrap or foil and place them all in a freezer-safe container or bag. They will keep well for up to 3 months. When you want to enjoy them, thaw overnight in the fridge or warm them directly from frozen, which helps maintain their fresh-baked texture.
Reheating
The best way to reheat your stovetop biscuits is either in a warm skillet over low heat for a few minutes on each side or in a toaster oven at 350°F for about 5 minutes until heated through. Avoid microwaving, as that tends to make them rubbery or soggy. Adding a little butter during reheating revives their golden crust and buttery flavor, making them taste almost as good as fresh.
FAQs
Can I use regular milk instead of buttermilk in this recipe?
While buttermilk gives the biscuits their tender crumb and slight tanginess, you can substitute regular milk mixed with one tablespoon of lemon juice or vinegar per cup to mimic the acidity. Let it sit for 5 minutes before using to curdle slightly. This substitute works well to maintain texture and flavor.
Why do I need to keep the butter cold when mixing the dough?
Cold butter is essential because it creates steam pockets when cooking, which lead to flaky layers inside the biscuits. If the butter melts into the flour too early, your biscuits will be denser and less tender. Grating or cutting cold butter helps ensure these perfect flaky layers.
Can I make these biscuits ahead of time and cook them later?
Absolutely! Feel free to shape and cut the biscuits, then freeze them on a baking sheet before storing in a bag. When ready to cook, simply thaw and cook in the skillet as directed. This is a great way to save time on busy mornings.
What kind of skillet works best for cooking these biscuits?
I highly recommend a heavy-bottomed cast iron skillet for even heat retention and a nicely browned crust. However, a nonstick pan will work in a pinch. Just keep the heat low to ensure the centers cook fully without burning the outside.
How do I know when the biscuits are fully cooked inside?
The biscuits should be golden brown on the outside and spring back slightly when pressed. Cooking them over low heat for 6 minutes per side usually ensures they’re cooked through. If you’re unsure, you can gently break one open to check that it’s no longer doughy inside.
Conclusion
I genuinely hope you give this Buttery Stovetop Biscuits Recipe a try because it brings together ease, flavor, and comfort in the most delightful way. These biscuits have truly earned a special place in my recipe rotation, and I can’t wait for you to experience their buttery layers and tender crumb for yourself. Whether it’s a quiet breakfast or a festive gathering, these biscuits will always add a little extra happiness to the table.