Why You’ll Love This Recipe
-
No-Bake and Quick: I can make these in about 30 minutes without turning on the oven.
-
Decadent Yet Simple: I use just a few pantry staples to create a dessert that tastes like a mini strawberry cheesecake.
-
Perfect for Celebrations: These are my go-to for romantic dinners, parties, or gifting.
-
Customizable: I often switch up the chocolate or add toppings like crushed nuts or sprinkles to suit my mood.
Ingredients
(Here’s a tip: Check out the full list of ingredients and measurements in the recipe card below.)
-
1 pound (about 12–15) large strawberries, thoroughly rinsed and dried
-
6 ounces (1 cup) semi-sweet chocolate chips
-
4 ounces cream cheese, softened
-
½ cup powdered sugar
-
1 teaspoon vanilla extract
-
¼ cup heavy cream, cold
Directions
-
Prepare the Strawberries: I rinse the strawberries and pat them completely dry. Then, I remove the tops and carefully hull the centers using a small paring knife.
-
Melt the Chocolate: I place the chocolate chips in a microwave-safe bowl and heat them in 30-second intervals, stirring between each, until fully melted and smooth.
-
Dip the Strawberries: I dip each strawberry into the melted chocolate, ensuring it’s well-coated. I place them on a parchment-lined baking sheet to set.
-
Make the Cheesecake Filling: In a large bowl, I combine the softened cream cheese, powdered sugar, and vanilla extract. I use a hand mixer to blend until smooth. Then, I add the cold heavy cream and beat for an additional 2 minutes until the mixture is light and fluffy. I refrigerate the filling for 15 minutes to chill.
-
Fill the Strawberries: I transfer the chilled cheesecake filling to a piping bag fitted with a tip. I pipe the filling into each chocolate-covered strawberry.
-
Set and Serve: If the filling seems soft, I place the strawberries in the refrigerator for 10–15 minutes to set. I serve them immediately or within 12 hours for the best texture and flavor.
Servings and Timing
-
Yield: Makes 12–15 strawberries
-
Prep Time: 20 minutes
-
Chill Time: 10 minutes
-
Total Time: 30 minutes
Variations
-
Chocolate Options: I sometimes use dark, milk, or white chocolate instead of semi-sweet for different flavor profiles.
-
Toppings: I like to sprinkle crushed graham crackers, chopped nuts, shredded coconut, or colorful sprinkles over the chocolate before it sets.
-
Fruit Alternatives: When strawberries aren’t in season, I use other fruits like cherries or pineapple chunks, dipping them in chocolate and serving the cheesecake filling as a dip.
Storage/Reheating
-
Storage: I store any leftovers in an airtight container in the refrigerator for up to 24 hours.
-
Freezing: I avoid freezing these treats, as the texture of the cheesecake filling and chocolate coating can be compromised upon thawing.
FAQs
How do I hollow out the strawberries?
I use a small paring knife to gently remove the tops and core out the centers, creating space for the cheesecake filling.
Can I use a different type of chocolate?
Yes, I often switch between semi-sweet, dark, milk, or white chocolate based on my preference or what I have on hand.
How far in advance can I make these?
I prepare them up to 12 hours in advance to ensure the best texture and flavor. I store them in the refrigerator until ready to serve.
What if I don’t have a piping bag?
I use a zip-top bag with a corner snipped off as a makeshift piping bag to fill the strawberries.
Can I make these dairy-free?
Yes, I substitute the cream cheese and heavy cream with dairy-free alternatives to accommodate dietary restrictions.
Conclusion
These Chocolate Covered Cheesecake Strawberries are a delightful combination of juicy fruit, rich chocolate, and creamy filling. I love how easy they are to make and how impressive they look on a dessert platter. Whether I’m celebrating a special occasion or just treating myself, these little bites always bring joy.
Print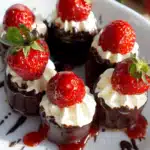
Chocolate Covered Cheesecake Strawberries
- Total Time: 30 minutes
- Yield: 12–15 strawberries
- Diet: Vegetarian
Description
These no-bake chocolate covered cheesecake strawberries are the ultimate indulgent treat—juicy berries dipped in chocolate and filled with sweet vanilla cream cheese.
Ingredients
For the Strawberries:
1 pound (about 12–15) large strawberries, rinsed and thoroughly dried
6 ounces (1 cup) semi-sweet chocolate chips
For the Cheesecake Filling:
4 ounces cream cheese, softened
½ cup powdered sugar
1 teaspoon vanilla extract
¼ cup cold heavy cream
Instructions
Prepare the Strawberries:
Rinse strawberries and pat dry completely. Remove the tops and hull the centers using a small knife to create space for filling.
Melt the Chocolate:
In a microwave-safe bowl, melt chocolate chips in 30-second intervals, stirring each time, until fully smooth.
Dip the Strawberries:
Dip each strawberry into the melted chocolate, covering completely. Place on a parchment-lined baking sheet and allow to set.
Make the Filling:
In a bowl, beat cream cheese, powdered sugar, and vanilla extract until smooth. Add heavy cream and beat for 2 minutes until light and fluffy. Chill filling for 15 minutes.
Fill the Strawberries:
Pipe the cheesecake mixture into each chocolate-coated strawberry using a piping bag (or zip-top bag with snipped corner).
Chill and Serve:
Refrigerate filled strawberries for 10–15 minutes until set. Serve within 12 hours for best results.
Notes
Use a paring knife or melon baller to neatly hollow out strawberries.
Try dark, milk, or white chocolate depending on your preference.
Optional toppings: crushed graham crackers, sprinkles, coconut, or chopped nuts.
- Prep Time: 20 minutes
- Category: Dessert
- Method: No-Bake
- Cuisine: American

