Why You’ll Love This Recipe
I love how simple and indulgent this no-bake dessert is. It combines the creamy tang of cream cheese with the sweetness of white chocolate and the warmth of pumpkin pie spice, giving the traditional cannoli a delightful twist. The best part is that it comes together quickly and only needs some chill time to set—no oven, no fuss. It’s ideal for making ahead, and it always looks as impressive as it tastes.

Ingredients
(Here’s a tip: Check out the full list of ingredients and measurements in the recipe card below.)
6 store-bought cannoli shells
8 oz cream cheese
4 oz heavy cream
1/2 cup canned pumpkin puree (not pumpkin pie filling)
1 1/4 cups powdered sugar plus extra for dusting
1/2 cup white chocolate chips
1 tsp pumpkin pie spice
2 tsp vanilla extract
Directions
-
I start by whipping the heavy cream in a large mixing bowl using a hand or stand mixer on high speed for about a minute, until it becomes light and fluffy.
-
Then, I reduce the mixer speed to medium and gradually add the powdered sugar until well combined.
-
I add the cream cheese, pumpkin puree, vanilla extract, and pumpkin pie spice, and continue mixing until everything is smooth and creamy.
-
I stir in the white chocolate chips for a little sweetness and crunch.
-
I transfer the filling into a piping bag and refrigerate it for about an hour to firm up, which makes it easier to pipe into the shells.
-
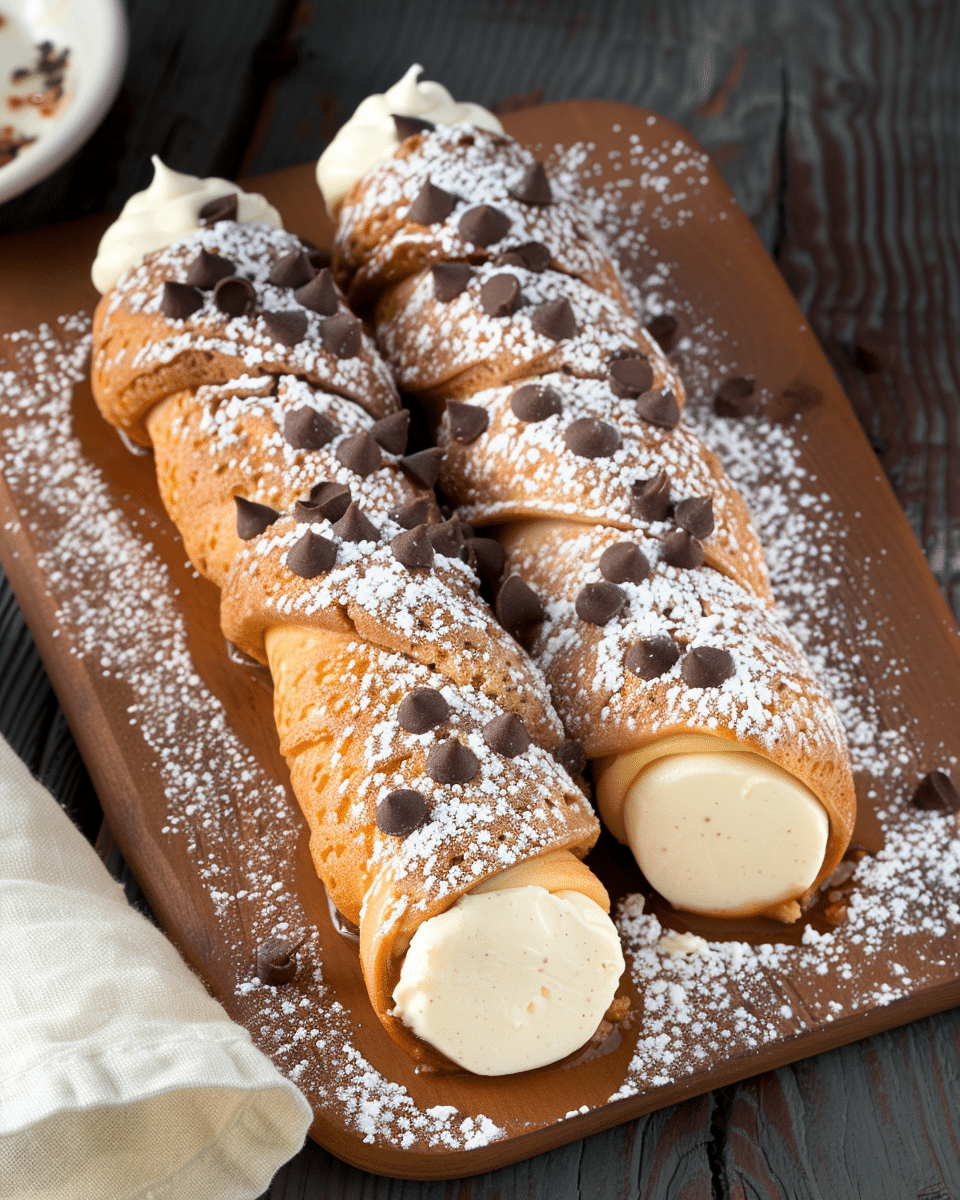
I fill both ends of each cannoli shell with the chilled mixture, making sure each one is generously stuffed.
-
For a final touch, I press extra white chocolate chips into the open ends, then refrigerate the filled cannoli for at least four hours to let the flavors meld and the filling set.
Servings and timing
This recipe makes 6 servings and takes about 5 hours and 15 minutes total, including chilling time. The active prep time is only about 15 minutes, making it perfect for a make-ahead dessert.
Variations
Sometimes I like to switch things up by using mini cannoli shells for bite-sized treats. For a chocolatey version, I dip the ends of the shells in melted dark or milk chocolate before filling. I also enjoy sprinkling crushed graham crackers or chopped nuts on the ends for extra texture. If I want to skip the pumpkin flavor, I replace the puree with 1/2 cup of mascarpone cheese and a dash of cinnamon for a more classic cannoli filling.
Storage/Reheating
I store the filled cannoli in an airtight container in the refrigerator for up to 3 days. To keep the shells crisp, I sometimes store the filling and shells separately, filling them right before serving. Since this is a chilled dessert, I never heat it—just serve it straight from the fridge, dusted with powdered sugar.
FAQs
Can I make the filling ahead of time?
Yes, I often prepare the filling a day in advance and refrigerate it. When I’m ready to serve, I just pipe it into the cannoli shells.
How do I keep the shells from getting soggy?
I fill the shells just before serving or within a few hours. Storing them separately from the filling keeps the shells perfectly crisp.
Can I use a different flavor instead of pumpkin?
Absolutely. I like experimenting with flavors such as chocolate, espresso, or even lemon zest for a refreshing twist.
Do I have to use white chocolate chips?
Not at all. I sometimes use mini dark chocolate chips or skip them entirely if I want a smoother texture.
What’s the best way to serve these cannoli?
I serve them chilled, dusted with powdered sugar, and sometimes with a drizzle of melted white chocolate for extra elegance.
Conclusion
This Cream Cheese Cannoli No-Bake Recipe is one of my favorite desserts to prepare when I want something quick yet luxurious. The creamy pumpkin filling, crunchy shells, and hint of spice make it irresistible. I love that it looks beautiful, tastes indulgent, and requires no baking—just a little patience while it chills. It’s the perfect sweet finish for any occasion.
Print
Cream Cheese Cannoli No-Bake Recipe
- Total Time: 5 hours 15 minutes
- Yield: 6 servings
- Diet: Vegetarian
Description
This easy no-bake dessert features crunchy cannoli shells filled with a dreamy pumpkin-spiced cream cheese filling and white chocolate chips—perfect for fall gatherings or anytime sweet cravings hit.
Ingredients
6 store-bought cannoli shells
8 oz cream cheese
4 oz heavy cream
1/2 cup canned pumpkin puree (not pumpkin pie filling)
1 1/4 cups powdered sugar (plus extra for dusting)
1/2 cup white chocolate chips
1 tsp pumpkin pie spice
2 tsp vanilla extract
Instructions
Whip the Cream: Using a hand mixer or stand mixer, beat the heavy cream on high for about 1 minute until fluffy.
Mix the Filling: Reduce speed to medium and add powdered sugar, blending until smooth. Add cream cheese, pumpkin puree, vanilla extract, and pumpkin pie spice. Mix well until creamy and fully combined.
Add Chocolate Chips: Stir in the white chocolate chips until evenly distributed.
Chill the Mixture: Transfer the cream mixture into a piping bag and refrigerate for 1 hour to firm up.
Fill the Cannoli: Pipe the chilled filling into both ends of each cannoli shell.
Set and Serve: Garnish the ends with extra white chocolate chips, dust with powdered sugar, and refrigerate for at least 4 hours before serving for best flavor and texture.
Notes
Use crispy cannoli shells for the best texture contrast with the creamy filling.
For a fun presentation, drizzle with melted white chocolate before serving.
If making ahead, keep the filling and shells separate until ready to serve to maintain crunch.
Add a sprinkle of cinnamon or crushed graham crackers for extra flavor.
- Prep Time: 15 minutes
- Category: Dessert
- Method: No-Bake
- Cuisine: Italian-American

