Why You’ll Love This Recipe
I love that these are no-bake, quick, and totally customizable. The brown butter gives the classic Rice Krispie Treats an extra depth of flavor, and the decorating part is where all the fun happens. I can get creative with the faces or keep them simple—it’s up to me. They’re also a great make-ahead treat that travels well and looks impressive with minimal effort.
Ingredients
(Here’s a tip: Check out the full list of ingredients and measurements in the recipe card below.)
For the brown butter Rice Krispie treats:
-
4 tablespoons unsalted butter
-
1 (10-ounce) bag mini marshmallows
-
5 cups Rice Krispies cereal
-
¼ teaspoon salt
-
1 teaspoon vanilla extract
For decorating:
-
1½ cups orange candy melts or white chocolate chips with orange food coloring
-
1–2 teaspoons coconut oil (optional, for smoother melting)
-
Black melting candy or melted chocolate – for drawing faces
-
Pumpkin-shaped cookie cutter
-
Parchment paper
Directions
Step 1: Make the Rice Krispie base
-
I melt the butter in a large pot over medium heat. I stir constantly until it foams and browns, about 5–7 minutes.
-
I lower the heat and stir in the marshmallows and salt until smooth. Then I remove it from heat and stir in the vanilla.
-
I add the Rice Krispies and mix quickly until everything is evenly coated.
-
I press the mixture into a parchment-lined 13×9-inch pan, using another piece of parchment to flatten the top. For thicker treats, I only use about ¾ of the pan. Let them cool completely.
Step 2: Cut out pumpkin shapes
-
Once cooled, I use a pumpkin-shaped cookie cutter to cut out as many treats as possible. I press and wiggle the cutter gently for clean edges.
-
I reshape the scraps by pressing them back into the cutter to make more pumpkins—nothing goes to waste.
Step 3: Melt the chocolate
-
I melt the orange candy melts (or white chocolate with orange food coloring) in the microwave in 30-second bursts, stirring between each round.
-
If needed, I add coconut oil to thin it out and make dipping easier.
Step 4: Dip and decorate
-
I dip the front of each pumpkin into the orange chocolate and let the excess drip off. Then I place them on parchment paper.
-
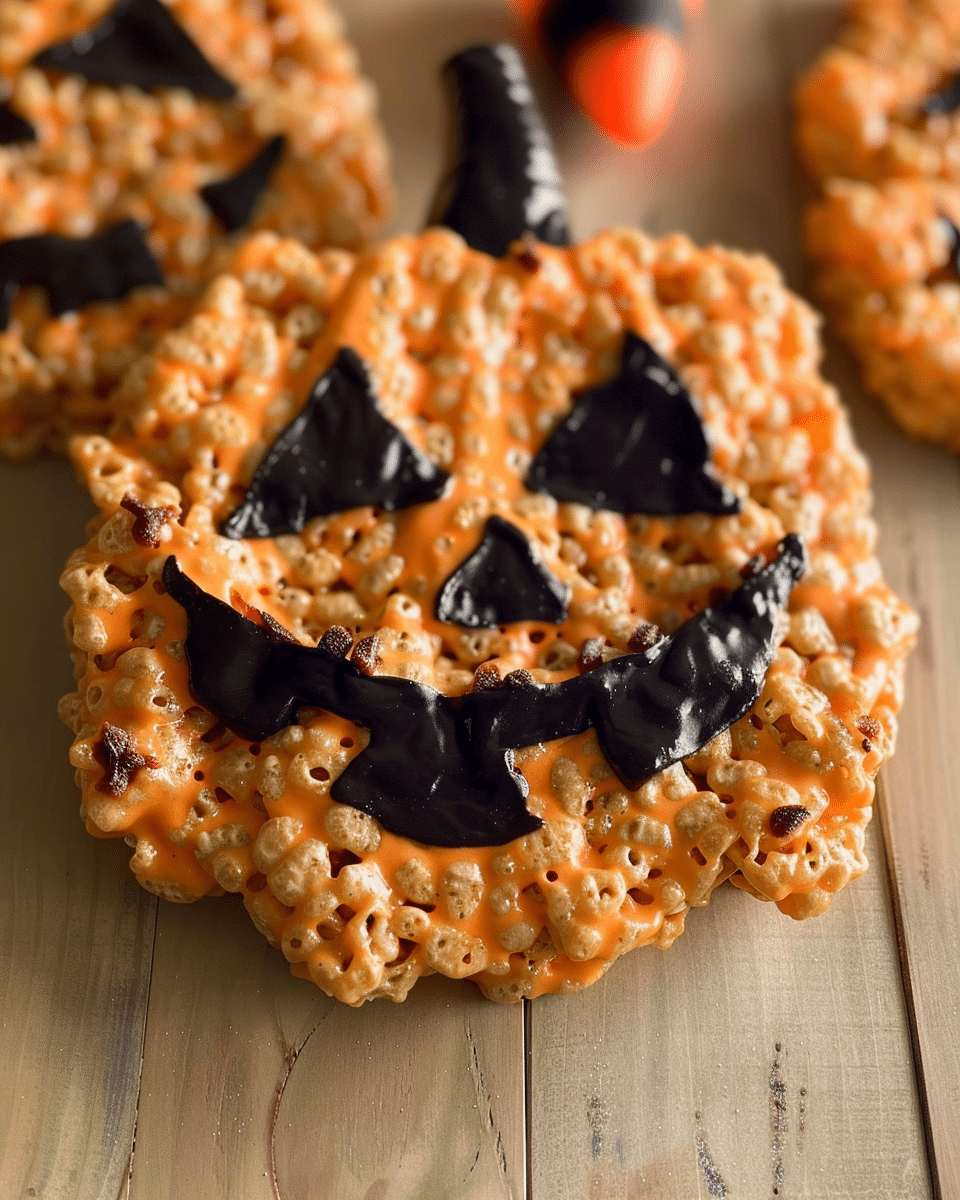
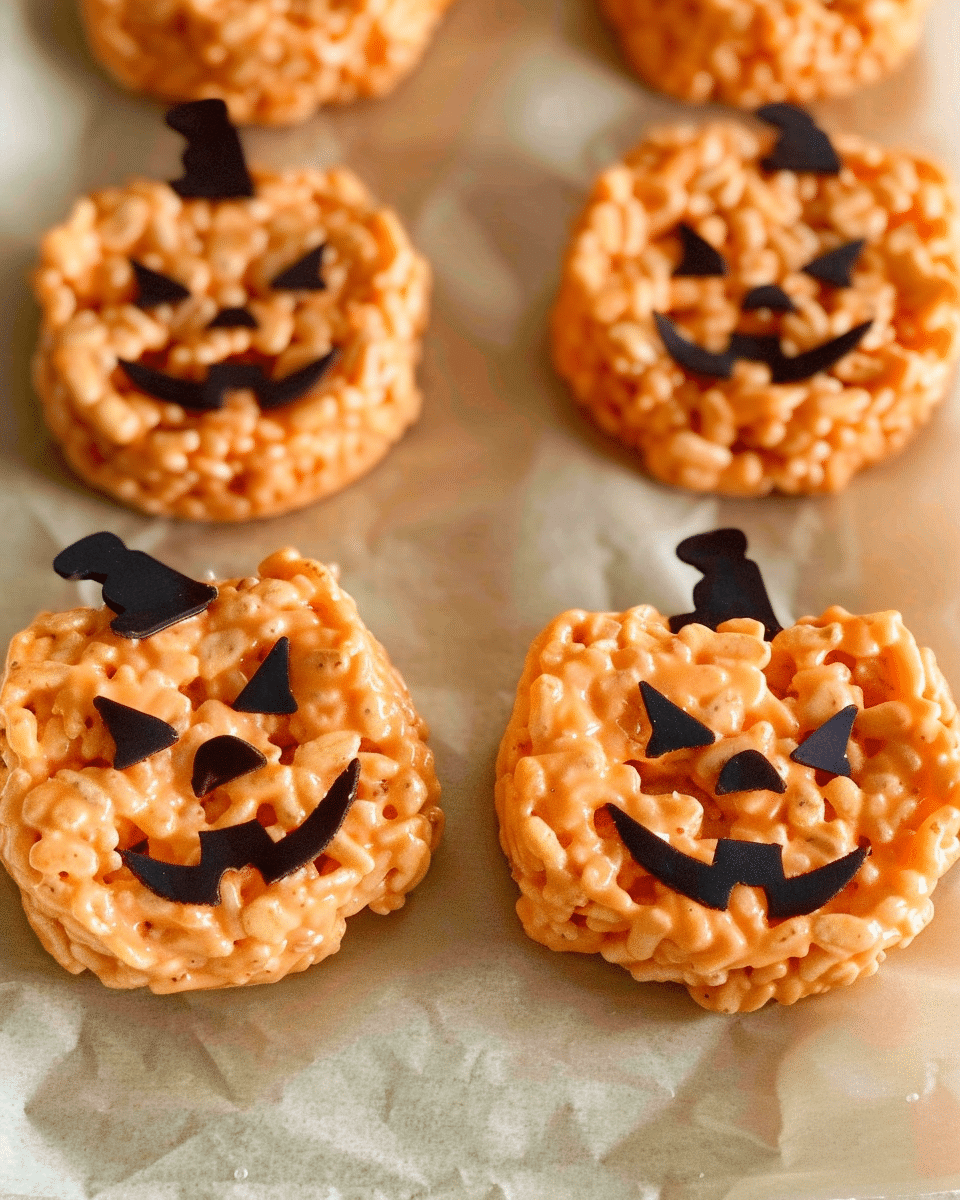
After the coating starts to set, I draw faces using black melted chocolate or decorating gel. I get creative—some scary, some silly.
-
I let everything cool until fully set before serving or packaging.
Servings and timing
This recipe makes about 12 pumpkin-shaped treats, depending on the size of my cookie cutter. Prep and cook time combined is around 30 minutes, and I allow extra time for cooling and setting—about another 30 minutes total.
Variations
-
I sometimes use peanut butter instead of vanilla for a nutty twist.
-
White chocolate dyed green makes a fun “stem” drizzle on top.
-
I use candy eyes or sprinkles to add personality to the jack-o’-lantern faces.
-
When I want a spooky mix, I make half with purple or green chocolate.
-
For smaller treats, I use mini cutters and serve bite-sized pumpkins on a platter.
Storage/Reheating
I store them in an airtight container at room temperature for up to 3 days. If stacking, I layer parchment paper between them. I avoid refrigerating unless my kitchen is very warm—if I do chill them, I let them come to room temp in the container to prevent condensation on the chocolate.
FAQs
Can I use store-bought Rice Krispie Treats?
I can, but I prefer homemade ones—they’re softer and easier to cut into shapes. Store-bought bars are usually thinner and firmer, which makes cutting tricky.
What can I use if I don’t have orange candy melts?
I use white chocolate chips and color them with gel or oil-based orange food coloring. I avoid water-based food coloring since it can make the chocolate seize.
How far in advance can I make these?
I make them 1–2 days ahead of time with great results. I store them in a cool place, layered between parchment in an airtight container.
Will a large cookie cutter work?
Yes, but I make sure my treats are thick enough to support the shape. Pressing the cereal mix into only part of the pan helps keep them nice and thick.
Do I need to refrigerate them?
Nope! Once the chocolate has set, they’re good at room temperature for a few days. Just keep them away from heat and humidity.
Conclusion
These Jack-O’-Lantern Rice Krispie Treats are more than just a festive dessert—they’re a hands-on Halloween activity and a guaranteed crowd-pleaser. I love how easy they are to make, how fun they are to decorate, and how much personality I can pack into each pumpkin. Whether for a party, a school treat, or just a seasonal snack, they’re always a hit in my haunted kitchen.
Print
Jack-O’-Lantern Rice Krispie Treats
- Total Time: 30 minutes
- Yield: 12 pumpkin-shaped treats
- Diet: Vegetarian
Description
These no bake jack-o’-lantern Rice Krispie treats are fun, festive, and perfect for Halloween! Made with browned butter, orange chocolate, and spooky faces kids will love.
Ingredients
For the Brown Butter Rice Krispie Treats:
4 tablespoons unsalted butter
1 (10-ounce) bag mini marshmallows
5 cups Rice Krispies cereal
¼ teaspoon salt
1 teaspoon vanilla extract
For Decorating:
1½ cups orange candy melts
or white chocolate chips + orange gel food coloring
1–2 teaspoons coconut oil (optional, for smoother melting)
Black melting candy or melted chocolate for faces
Pumpkin-shaped cookie cutter
Parchment paper
Instructions
Step 1: Make the Rice Krispie Treats
Melt butter in a large pot over medium heat, stirring until it foams and browns (about 5–7 minutes).
Lower the heat, stir in marshmallows and salt until melted. Remove from heat and stir in vanilla.
Add Rice Krispies and mix to coat evenly.
Press mixture into a parchment-lined 13×9-inch pan (or use ¾ of the pan for thicker treats). Let cool completely before cutting.
Step 2: Cut into Pumpkins
Use a pumpkin-shaped cookie cutter to cut out shapes.
Reuse scraps by pressing them back into the cutter.
Step 3: Melt the Chocolate
In a microwave-safe bowl, melt orange candy melts (or white chocolate + orange food coloring) in 30-second intervals.
Add 1–2 teaspoons of coconut oil for a smoother, easier dip.
Step 4: Dip and Decorate
Dip each pumpkin treat into the orange chocolate and let excess drip off. Place on parchment to set.
Once the chocolate is slightly set, draw jack-o’-lantern faces using melted black chocolate, decorating gel, or candy eyes.
Let the decorations set fully before serving or packaging.
Notes
For thicker treats, only fill part of the 13×9 pan.
Use oil-based or gel coloring for chocolate (not water-based).
Let chocolate coating set slightly before decorating to prevent smearing.
Store in an airtight container at room temp for up to 3 days.
Chill briefly if needed, but bring to room temp before serving to avoid condensation.
- Prep Time: 20 minutes
- Cook Time: 10 minutes
- Category: Dessert, Snack
- Method: No-Bake
- Cuisine: American

