Why You’ll Love This Recipe
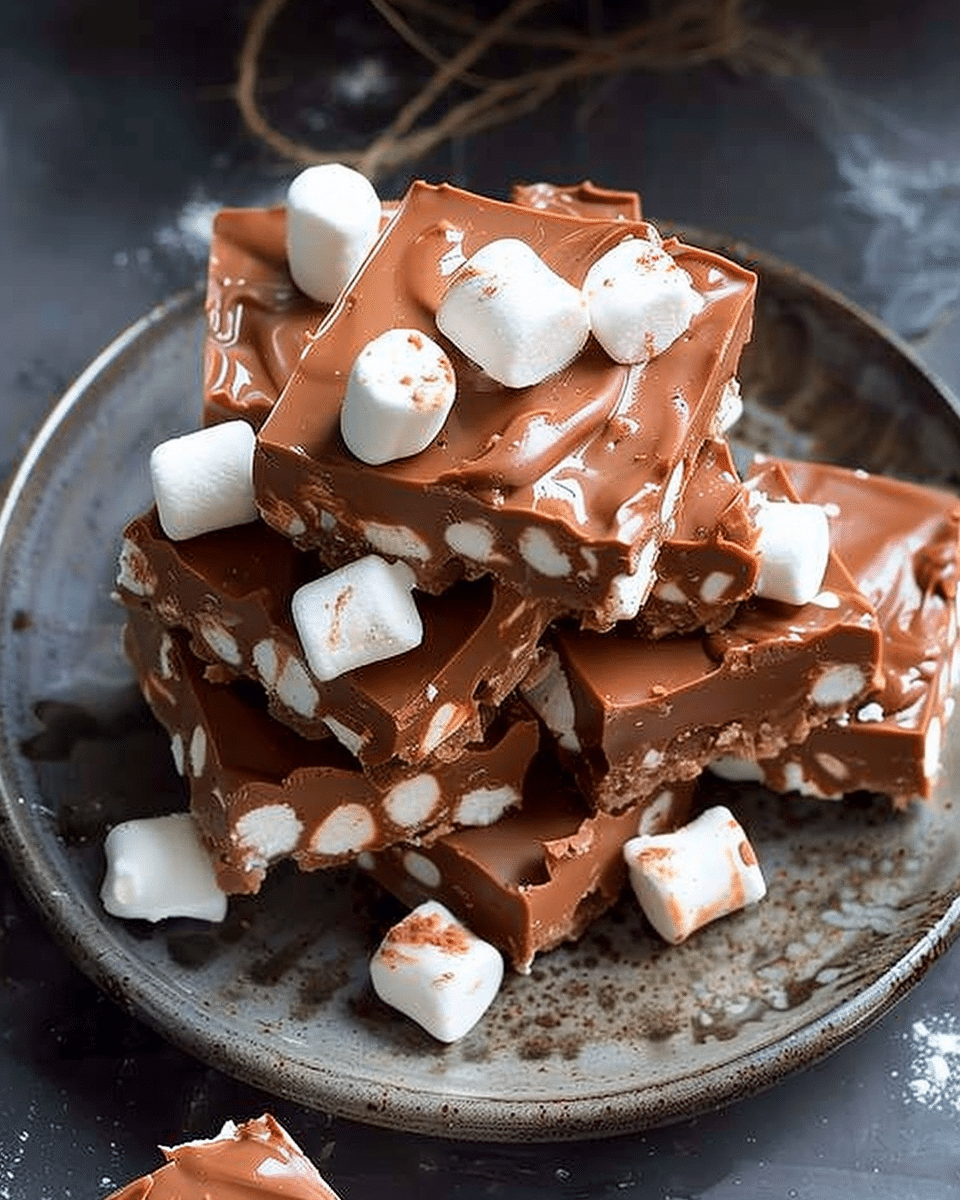
I love how effortless this recipe is. With just a few ingredients and a microwave, I get a rich and satisfying treat that feels like it took way more work. It’s the perfect last-minute dessert to bring to a holiday gathering or to enjoy quietly at home with a warm drink. The texture is also amazing—soft marshmallows surrounded by creamy, melt-in-your-mouth chocolatey goodness. No oven, no stress, and no compromise on taste.
Ingredients
(Here’s a tip: Check out the full list of ingredients and measurements in the recipe card below.)
-
2 cups semi-sweet chocolate chips
-
2 cups butterscotch baking chips
-
1 cup creamy peanut butter (do not use natural peanut butter)
-
4 cups mini marshmallows
Directions
-
I start by lining a 9×13-inch baking pan with parchment paper, making sure to let the excess hang over the edges—this makes lifting the finished block out of the pan so much easier.
-
In a large microwave-safe bowl, I combine the chocolate chips, butterscotch chips, and peanut butter.
-
I microwave the mixture on medium power for 30 seconds, stir it, and then continue microwaving in 5 to 10 second increments—stirring each time—until everything is silky smooth.
-
Once melted, I fold in the mini marshmallows using a rubber spatula, making sure every marshmallow is well coated.
-
I pour the mixture into the prepared pan, pressing it gently into the corners and leveling the surface.
-
I let it sit at room temperature for 2 to 3 hours until it firms up completely. Refrigerating can cause white streaks, so I avoid that.
-
Once set, I lift the block out using the parchment paper, place it on a cutting board, and cut it into 1.5-inch squares.
-
I store the squares in a food-safe container in the fridge.
Servings and timing
This recipe makes approximately 78 small squares.
-
Prep time: 5 minutes
-
Cook time: 5 minutes
-
Total time: 10 minutes (plus cooling time)
Variations
-
Add crunch: I sometimes add chopped nuts like peanuts or almonds for a crunchy texture.
-
Swap chips: If I want a slightly different flavor profile, I swap out the butterscotch chips for white chocolate or milk chocolate chips.
-
Holiday flair: A handful of crushed peppermint candies or a drizzle of white chocolate on top adds a festive touch.
-
Dried fruit: Chopped dried cranberries or raisins mix in well for added chewiness and a sweet-tart contrast.
-
Sprinkle finish: For a decorative finish, I sprinkle sea salt or holiday-themed sprinkles before it sets.
Storage/Reheating
I store these squares in an airtight container in the refrigerator to keep them fresh and firm. They stay good for up to 7 days. If I want to serve them softer, I leave them out at room temperature for about 10-15 minutes before serving. These don’t need reheating, but they freeze beautifully if I want to store them longer—just separate layers with parchment paper and freeze for up to 2 months.
FAQs
How do I prevent the chocolate from seizing in the microwave?
I microwave the chocolate mixture slowly on medium power and stir frequently. Overheating can cause seizing, so I take it slow and gentle.
Can I use natural peanut butter?
I don’t recommend it. Natural peanut butter tends to separate and has a runnier texture, which can affect how the squares set up.
Can I freeze No Bake Chocolate Marshmallow Squares?
Yes, I freeze them by placing parchment paper between layers in an airtight container. They keep well for up to 2 months.
Why did white streaks form on my chocolate?
That’s from refrigerating the mixture too quickly. The milk solids separate under cold conditions. I always let mine cool at room temperature to avoid that.
Can I use large marshmallows instead of mini?
I could, but I’d need to chop them up into smaller pieces. Mini marshmallows are ideal because they distribute evenly and coat better.
Conclusion
No Bake Chocolate Marshmallow Squares are everything I want in a homemade treat—quick, indulgent, and totally addictive. Whether I’m making them for a party platter or just to satisfy a craving, they never fail to impress. With their simple prep and deliciously rich flavor, they’ve become a go-to dessert in my holiday rotation.
Print
No Bake Chocolate Marshmallow Squares
- Total Time: 10 minutes
- Yield: 78 pieces
- Diet: Vegetarian
Description
The perfect holiday treat made in just 10 minutes! These rich, chewy No Bake Chocolate Marshmallow Squares are loaded with creamy peanut butter, butterscotch, and mini marshmallows – an easy microwave dessert everyone will love.
Ingredients
2 cups semi-sweet chocolate chips
2 cups butterscotch baking chips
1 cup creamy peanut butter (do not use natural peanut butter)
4 cups mini marshmallows
Instructions
Line a 9 x 13 inch baking pan with parchment paper, leaving some overhang to lift out later.
In a large microwave-safe bowl, combine chocolate chips, butterscotch chips, and peanut butter.
Microwave on medium power for 30 seconds. Stir and continue microwaving in 5–10 second intervals, stirring each time, until smooth.
Fold in mini marshmallows, ensuring they’re fully coated.
Pour mixture into prepared pan, smoothing out with a spatula to create an even layer.
Let cool and firm at room temperature for 2–3 hours (avoid refrigerating to prevent chocolate streaking).
Once firm, lift out using parchment overhang, cut into 1.5-inch squares, and store in the refrigerator.
Notes
Avoid using natural peanut butter, as the oils may separate and affect the texture.
Do not refrigerate to speed up cooling—this can cause white streaks due to milk solid separation.
Perfect for make-ahead holiday treats!
- Prep Time: 5 minutes
- Cook Time: 5 minutes
- Category: Dessert
- Method: No Bake / Microwave
- Cuisine: American

