Why You’ll Love This Recipe
I love this recipe because it combines the comforting textures of soft dough and crispy bottoms with a flavorful, plant-based filling. The combination of cabbage and noodles creates a hearty and satisfying bite, while the pan-frying technique adds a delightful crunch. Plus, these buns are versatile—they can be served as a snack, appetizer, or main course, and they’re perfect for meal prep or freezing for later enjoyment.
Ingredients
(Here’s a tip: Check out the full list of ingredients and measurements in the recipe card below.)
For the Dough:
-
3 cups all-purpose flour
-
2 tsp instant dry yeast
-
2 tbsp sugar
-
1/2 tsp salt
-
1 tbsp roasted sesame seeds
-
1 cup warm soy milk or other non-dairy milk
-
1 tbsp toasted sesame oil or neutral oil
For the Filling:
-
1 tbsp neutral oil for cooking
-
6 cups raw shredded cabbage (from 1/2 large head of cabbage)
-
3.5 oz uncooked vermicelli noodles
-
1 cup finely shredded or grated carrot
-
1/2 cup chopped scallions or chives
-
1 tbsp soy sauce
-
2 tsp salt (or to taste)
-
1 tbsp roasted sesame seeds
-
2 tbsp toasted sesame oil
Directions
Preparing the Dough:
-
In a large bowl, I mix together the flour, yeast, sugar, salt, and sesame seeds.
-
I create a well in the center and pour in the warm soy milk and oil, mixing until a dough forms.
-
I knead the dough until it’s smooth, shape it into a ball, cover with a damp towel, and let it rest for at least 2 hours until it doubles in size.
Preparing the Filling:
-
I soak the vermicelli noodles in boiling water for 7-8 minutes, then drain and chop them into small pieces.
-
In a pan, I heat the neutral oil and sauté the chives, carrots, and cabbage over medium-high heat for 4-5 minutes until the carrots are tender.
-
I add the chopped noodles, soy sauce, salt, and sesame oil, mixing well and cooking for another 2-3 minutes.
-
I transfer the filling to a strainer to drain excess liquid and let it cool completely.
Assembling the Buns:
-
I divide the dough into 12 to 16 equal pieces, rolling each into a ball.
-
On a floured surface, I flatten each ball into a wrapper about 3-4 inches in diameter.
-
I place 2-3 tablespoons of the cooled filling in the center of each wrapper.
-
I pleat the edges and pinch to seal, giving the buns a neat twist at the top.
Cooking the Buns:
-
In a pan with a lid, I heat 1 tablespoon of oil over medium heat.
-
I place the buns seam-side down and cook for 4-5 minutes until the bottoms are golden brown.
-
Carefully, I add 1 tablespoon of water per bun to the pan, cover immediately, and let the buns steam until the water evaporates, about 5-6 minutes.
-
I remove the buns and repeat the process for the remaining ones.
Servings and Timing
This recipe yields 12 to 16 buns. Preparation time is approximately 1 hour, with an additional 2 hours for dough resting and 30 minutes for cooking, totaling about 3 hours and 30 minutes.
Variations
-
Alternative Fillings: I sometimes incorporate other vegetables like mushrooms, bamboo shoots, or mustard greens for different flavors.
-
Spice Level: To adjust the heat, I vary the amount of chili sauce in the dipping sauce.
-
Gluten-Free Option: I use gluten-free flour and noodles to accommodate dietary restrictions.
Storage/Reheating
I store the cooked buns in an airtight container in the refrigerator for up to 5 days. To reheat, I pan-fry them again with a splash of water or oven-toast them at low heat. Alternatively, I microwave the buns in a bowl with a splash of water. For longer storage, I freeze the cooked buns and reheat them in the oven toaster or steam them before enjoying—no need to thaw.
FAQs
How can I prevent the buns from sticking to the pan?
I ensure the pan is well-heated and lightly oiled before adding the buns. Using a non-stick pan or well-seasoned cast iron skillet also helps prevent sticking.
Can I make the dough ahead of time?
Yes, I prepare the dough in advance and refrigerate it overnight. I let it come to room temperature before rolling and assembling the buns.
What dipping sauce pairs well with these buns?
I enjoy a simple sauce made from soy sauce, sugar, chili sauce, and sesame seeds. Adjust the proportions to taste for a balance of salty, sweet, and spicy flavors.
Can I bake these buns instead of pan-frying?
While pan-frying gives the buns their characteristic crispy bottom, I sometimes bake them at 375°F (190°C) for about 20 minutes until golden brown for a different texture.
How do I ensure the filling isn’t too wet?
After cooking the filling, I transfer it to a strainer to drain excess liquid and let it cool completely before assembling the buns. This prevents the dough from becoming soggy.
Conclusion
Pan-Fried Cabbage and Noodle Buns are a delightful fusion of textures and flavors that I find both comforting and satisfying. Whether enjoyed fresh off the pan or reheated from the freezer, these vegan buns are a versatile addition to my culinary repertoire. I hope you enjoy making and savoring them as much as I do.
Print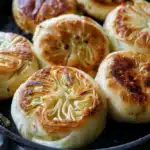
Pan-Fried Cabbage and Noodle Buns
- Total Time: 3 hours 30 minutes
- Yield: 12–16 buns
Description
Soft, flavorful buns with a crisp base and hearty filling—these homemade vegan cabbage buns are packed with texture and umami-rich flavor.
Ingredients
For the Dough:
3 cups all-purpose flour
2 tsp instant dry yeast
2 tbsp sugar
1/2 tsp salt
1 tbsp roasted sesame seeds
1 cup warm soy milk (or non-dairy milk)
1 tbsp toasted sesame oil or neutral oil
For the Filling:
1 tbsp neutral oil
6 cups shredded raw cabbage
3.5 oz vermicelli noodles (uncooked)
1 cup finely shredded carrot
1/2 cup chopped scallions or chives
1 tbsp soy sauce
2 tsp salt (or to taste)
1 tbsp roasted sesame seeds
2 tbsp toasted sesame oil
Instructions
Prepare the Dough:
In a large bowl, combine flour, yeast, sugar, salt, and sesame seeds.
Add warm soy milk and oil; stir to form a dough.
Knead until smooth, cover with a damp towel, and let rise for 2 hours until doubled in size.
Make the Filling:
Soak vermicelli in boiling water for 7–8 minutes. Drain and chop into small pieces.
Heat oil in a skillet. Sauté cabbage, carrot, and scallions until tender (4–5 minutes).
Add chopped noodles, soy sauce, salt, and sesame oil. Cook 2–3 more minutes.
Transfer to a strainer and let cool completely.
Assemble the Buns:
Divide dough into 12–16 balls. Flatten each into a 3–4 inch round.
Place 2–3 tbsp of filling in the center, pleat edges, and seal at the top.
Cook the Buns:
Heat 1 tbsp oil in a pan over medium heat.
Place buns seam-side down and cook for 4–5 minutes until golden.
Add 1 tbsp water per bun, cover, and steam 5–6 minutes until water evaporates.
Repeat for remaining buns.
Notes
Be sure to drain and cool the filling thoroughly to avoid soggy dough.
Letting buns rest after shaping improves their texture and rise during pan-frying.
For an extra-crispy bottom, use a cast iron or non-stick pan with a lid.
- Prep Time: 1 hour
- Cook Time: 30 minutes
- Category: Appetizer / Snack / Main Dish
- Method: Pan-Fried & Steamed

