Why You’ll Love This Recipe
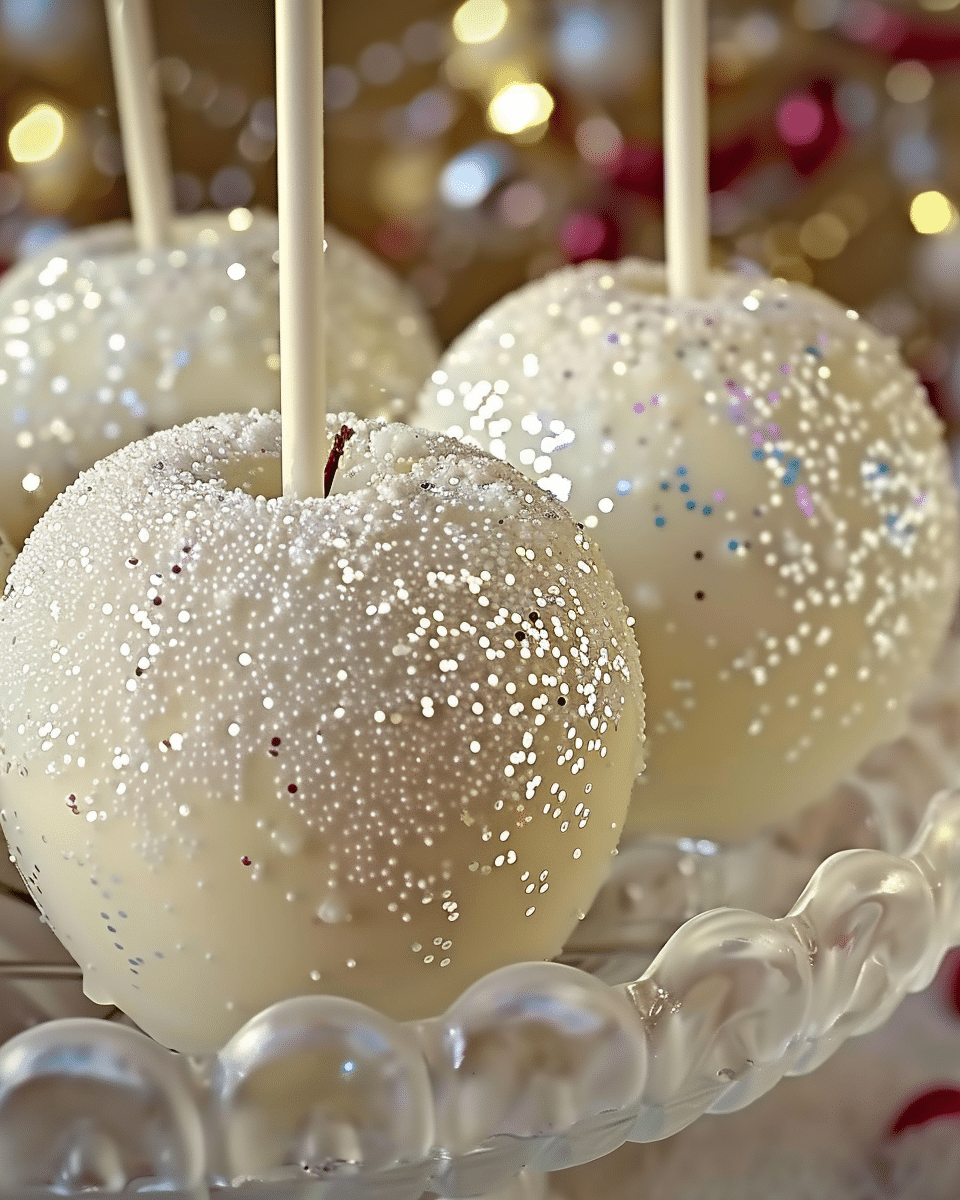
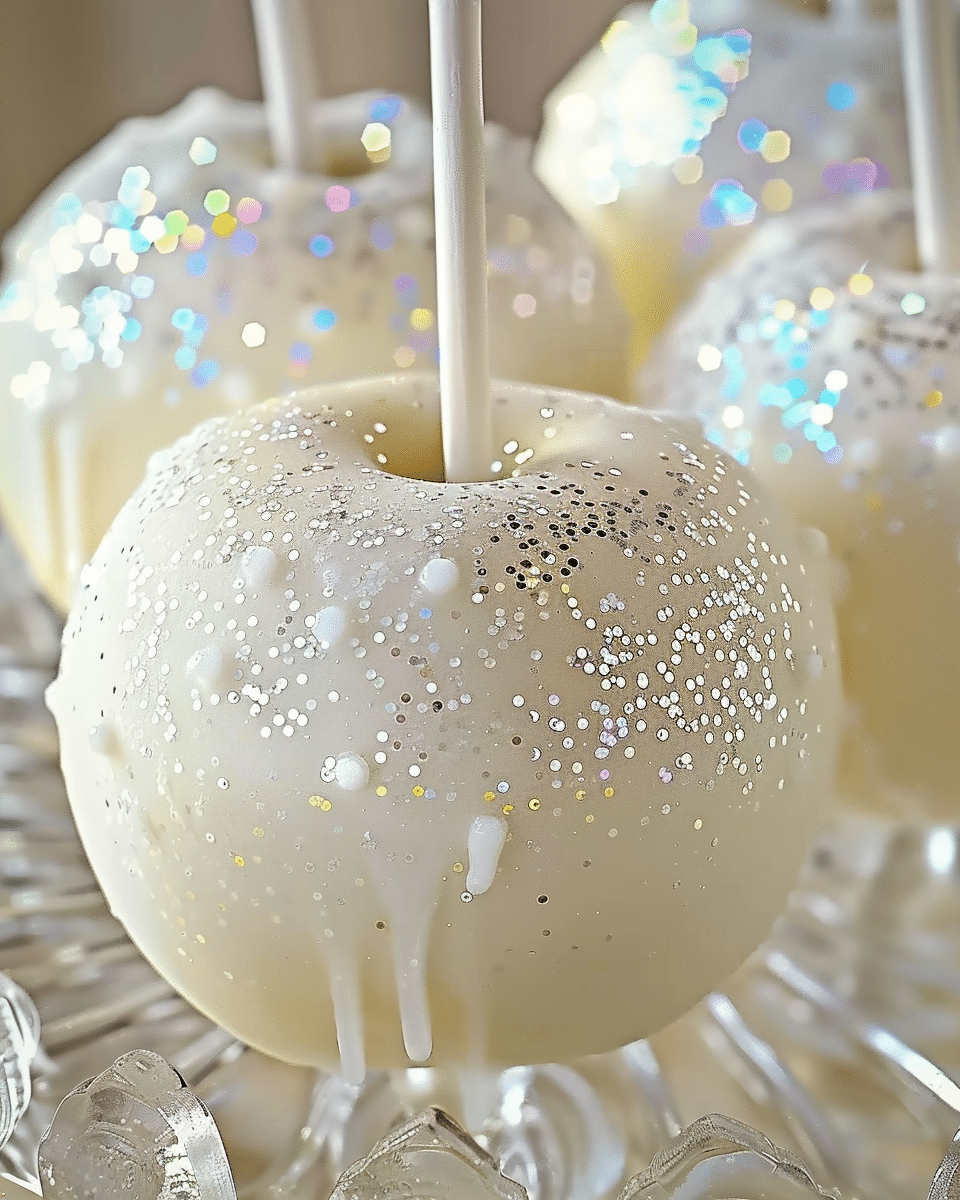
I love making these because they combine simple ingredients with a stunning presentation. The pearl-white candy coating gives them a magical shine, and with a sprinkle of edible glitter or luster dust, they become an edible centerpiece. They’re easy to customize for any theme or event, and despite their bakery-level appearance, I can whip them up at home with just a few tools.
Ingredients
(Here’s a tip: Check out the full list of ingredients and measurements in the recipe card below.)
Apples
-
Granny Smith apples (my go-to for their tart flavor and firm texture)
-
You can also use Gala, Fuji, or Honeycrisp for a sweeter version
Candy Coating
-
2 cups granulated sugar
-
½ cup light corn syrup
-
¾ cup water
-
White gel food coloring (oil-based preferred for bright, opaque color)
-
Edible glitter, pearl dust, or luster dust (must be labeled food-grade)
Tools Needed
-
Candy thermometer
-
Wooden treat sticks
-
Parchment paper or silicone mat
-
Saucepan with heavy bottom
-
Heatproof spatula
Directions
-
Prep the Apples:
I wash the apples thoroughly in hot water with a splash of vinegar to remove any waxy coating, then dry them completely. I insert wooden sticks into the center of each apple and set them aside on parchment paper. -
Cook the Candy Coating:
In a saucepan, I combine the sugar, corn syrup, and water. I bring it to a boil over medium-high heat, stirring just until the sugar dissolves. Once it starts boiling, I stop stirring and let it cook until the mixture reaches 300°F (hard crack stage) on a candy thermometer. -
Add Color:
Once the sugar hits the right temperature, I remove it from the heat and quickly stir in a few drops of white gel food coloring. I don’t wait too long here because the candy sets fast. -
Dip the Apples:
Working quickly, I dip each apple into the hot candy, gently twisting it to coat evenly. I let the excess drip off, then place the coated apples on parchment paper. -
Add the Sparkle:
While the coating is still warm and tacky, I dust each apple with edible glitter or pearl dust. This step transforms them into the showstoppers I love. -
Cool and Set:
I let the apples sit at room temperature until fully cooled and the shell is hardened.
Servings and Timing
-
Yield: 6 candy apples
-
Prep Time: 15 minutes
-
Cook Time: 10–15 minutes
-
Cooling Time: 20–30 minutes
-
Total Time: About 1 hour
-
Calories per apple: Approx. 200–250 kcal
Variations
These candy apples are endlessly customizable, and I love tailoring them to match different occasions:
-
Weddings: Use white pearl dust with gold or rose gold accents and wrap in clear boxes with monogram tags.
-
Baby Showers: Add blue or pink shimmer and pair with pastel table décor.
-
Birthdays: Coordinate glitter colors with the party theme—unicorn, mermaid, or even Barbie-style pink.
-
Holidays: Try red shimmer for Valentine’s Day or green and gold for Christmas.
Storage/Reheating
Storage:
I store the finished apples at room temperature in a cool, dry place for up to 3 days. I never refrigerate them—humidity makes the candy sticky and ruins the shine.
Packaging Tips:
If I’m gifting or selling them, I wrap each apple in cellophane or place it in a clear treat box tied with ribbon. I always avoid stacking to prevent smudging the candy shell.
FAQs
What’s the best type of apple to use?
I always choose Granny Smith for their firmness and tartness—it balances out the sweet candy coating beautifully. Other apples like Fuji or Gala work if I want a sweeter bite.
Can I use natural glitter or shimmer?
Yes, but I make sure it’s FDA-approved and specifically labeled as food-grade edible glitter. Decorative craft glitter is not safe to eat.
How do I prevent the candy from sliding off?
I make sure the apples are completely wax-free and dry before dipping. Soaking in hot vinegar water helps the candy stick better.
Why did my candy coating turn yellow?
It likely overheated. I always monitor the temperature closely and remove the candy from heat as soon as it hits 300°F (hard crack stage).
Can I make them in advance?
Yes! I often make them a day ahead and store them in a dry place. Just avoid humidity and don’t stack them to preserve their flawless finish.
Conclusion
These White Sparkle Candy Apples are the perfect way to dress up a nostalgic favorite and add a touch of glam to any celebration. I love that they’re simple to make, endlessly customizable, and always make a statement. Whether I’m gifting them, styling them as favors, or serving them at a party, they never fail to steal the spotlight—and get everyone talking.
Print
White Sparkle Candy Apples – Elegant, Crunchy & Edible Glam
- Total Time: 50 minutes
- Yield: 6–8 candy apples
- Diet: Gluten Free
Description
Elegant and eye-catching, these white sparkle candy apples are dipped in a glossy candy shell and dusted with edible glitter—perfect for weddings, showers, birthdays, or holiday parties.
Ingredients
Instructions
Prep the Apples:
Wash apples thoroughly in hot water with a splash of vinegar to remove any wax. Dry completely. Insert wooden sticks into the top of each apple.
Prepare the Work Surface:
Line a baking sheet with parchment paper or a silicone mat and lightly grease to prevent sticking.
Make the Candy Coating:
In a heavy saucepan, combine sugar, corn syrup, and water. Stir over medium heat until sugar dissolves. Insert the candy thermometer and bring the mixture to 300°F (hard crack stage) without stirring.
Color the Coating:
Remove from heat and stir in a few drops of white gel food coloring until fully blended and opaque.
Dip the Apples:
Working quickly, dip each apple into the candy mixture, slowly rotating for full coverage. Let excess drip off. Place on the prepared surface.
Add the Sparkle:
While the coating is still slightly tacky, dust apples with edible glitter, pearl dust, or luster dust using a clean brush or shaker.
Cool & Set:
Let the apples cool completely at room temperature. Do not refrigerate.
Notes
Humidity Alert: Always make candy apples on a dry day—moisture can ruin the glossy finish.
Color Variations: Add pastel or metallic gel coloring to match your theme.
Safety Reminder: Only use FDA-approved edible glitter or shimmer dusts labeled “food-grade.”
Flavor Tip: For an extra twist, add a drop of vanilla or almond extract to the candy mixture once removed from heat.
- Prep Time: 15 minutes
- Cook Time: 15 minutes
- Category: Appetizers & Snacks, Party Treats, Desserts
- Cuisine: American

