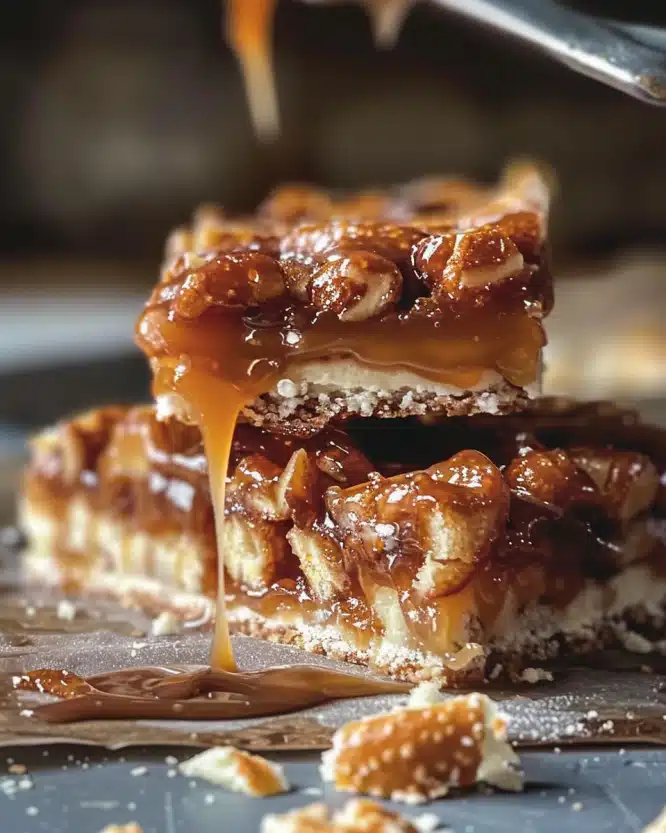
I absolutely adore making this Chocolate Chip Pie Recipe because it’s one of those magical desserts that bring together the rich, comforting taste of chocolate with a delightfully tender, buttery crust. Every time I bake this pie, it fills my kitchen with a heavenly aroma that instantly lifts everyone’s spirits. What I love most is how easy it is to make yet so impressive to serve, making it a go-to for family gatherings or cozy nights in.
Why You’ll Love This Chocolate Chip Pie Recipe
From the very first bite, I’m captivated by the perfect balance of sweet and slightly nutty flavors that this pie delivers. The chocolate chips give it that rich, melty quality we all crave in a dessert, while the lightly golden crust adds a satisfying crunch. There’s a warmth in the taste that feels both indulgent and inviting, making it my absolute favorite comfort food. The subtle hint of vanilla and the familiar sweetness of brown sugar add layers of flavor that keep you reaching for seconds.
What really makes this Chocolate Chip Pie Recipe special to me is how simple it is to prepare without sacrificing any of the deliciousness. Even if you’re not a seasoned baker, you can easily follow the steps and end up with a pie that looks and tastes like it came from a bakery. I often save this recipe for special occasions, whether it’s a holiday dinner or a casual weekend treat, because it’s universally loved and incredibly satisfying. Watching friends and family enjoy this pie brings me so much joy, and I’m sure it will do the same for you.
Ingredients You’ll Need

Each ingredient in this Chocolate Chip Pie Recipe plays an essential role, bringing either richness, structure, or texture to the final creation. The beauty of this recipe is in its simplicity—just a handful of pantry staples come together to create something truly special.
- 9 inches unbaked pie crust: Provides a flaky, buttery base that perfectly supports the filling.
- ½ cup all-purpose flour: Helps set the pie’s structure so it holds together beautifully.
- ½ teaspoon baking soda: Adds a touch of lift and lightness to the filling.
- 2 large eggs (room temperature): Vital for binding all the ingredients and giving the pie its custard-like texture.
- ½ cup salted butter (softened): Adds richness and depth of flavor, balancing the sweetness.
- ¾ cup granulated sugar: Sweetens the pie without overpowering the chocolate.
- ¼ cup packed light brown sugar: Brings a subtle molasses note that enhances the caramelized flavor.
- 2 teaspoons vanilla extract: Infuses warmth and complexity to the filling.
- ½ cup semi-sweet chocolate chips: The star ingredient, melting into delightful pockets of chocolate.
- ½ cup chopped walnuts or pecans (optional): Adds a crunchy texture and a nutty contrast, which I always love.
Directions
Step 1: Preheat your oven to 325°F and place your unbaked pie crust in the freezer. Chilling the crust while you prepare the filling helps it stay flaky and prevents it from getting soggy during baking.
Step 2: In a small bowl, whisk together the all-purpose flour and baking soda. Set this mixture aside because you’ll be adding it to the filling shortly, and it’s essential for the right texture.
Step 3: In a large mixing bowl, beat your room temperature eggs using a whisk attachment until they’re very foamy. This creates a light base for your filling. Then, beat in the softened butter, granulated sugar, brown sugar, and vanilla extract, making sure to scrape down the sides and the bottom of the bowl so everything mixes evenly.
Step 4: Gradually add the flour and baking soda mixture to the wet ingredients, beating until fully combined but not over-mixed. You want just the right consistency so the pie sets perfectly.
Step 5: Fold in the chocolate chips and chopped nuts if you’re including them. This step is so satisfying because you can already imagine those gooey pockets of chocolate waiting inside each slice.
Step 6: Pour the filling into the pie crust, scraping the bowl to get every bit of batter. Smooth the top gently with a spatula so it bakes evenly.
Step 7: Bake the pie for 45 to 50 minutes. Keep an eye on it—the top should turn a beautiful golden brown, and the center will be just slightly jiggly. This tells you the perfect doneness so the pie stays moist and luscious inside.
Step 8: Allow the pie to cool for at least 30 minutes before slicing. I like to let it cool completely so the filling sets fully but serving warm with vanilla ice cream is irresistible too. For an extra touch, drizzle with chocolate sauce before serving.
Servings and Timing
This Chocolate Chip Pie Recipe yields about 8 generous servings, making it perfect for sharing with family and friends. The prep time is roughly 15 minutes, which is wonderfully quick for a homemade pie. Baking takes about 45 to 50 minutes, plus another 30 minutes of cooling time before you dig in. Altogether, you’re looking at about 1 hour and 30 minutes from start to indulgent finish—well worth the wait!
How to Serve This Chocolate Chip Pie Recipe

When I serve this chocolate chip pie, I love pairing it with a scoop of rich, creamy vanilla ice cream. The contrast of warm pie and cold ice cream creates a perfect harmony of temperatures and textures. Another favorite of mine is to drizzle a bit of warm chocolate or caramel sauce on top for an extra layer of decadence that always impresses guests.
Presentation-wise, I like slicing the pie into moderate portions so everyone gets a good balance of crust and filling. A simple dusting of powdered sugar can add an elegant touch, or garnish with a few extra chocolate chips or a sprinkle of chopped nuts to hint at the flavors inside. This pie pairs beautifully with a lightly brewed coffee or a glass of sweet dessert wine, but it’s just as delightful with a cold glass of milk or a classic hot chocolate for a cozy night in.
This pie really shines at family dinners, potlucks, and holiday celebrations, but I won’t lie—I often make it just for an indulgent weekend treat. It’s perfect served warm or at room temperature, so you have flexibility depending on your mood and schedule.
Variations
One of the things I love about this Chocolate Chip Pie Recipe is how versatile it is. If you’re not a fan of nuts or have dietary restrictions, you can easily omit the walnuts or pecans or swap them for toasted coconut flakes for a tropical twist. For those who follow a gluten-free diet, using a gluten-free pie crust and a gluten-free baking mix in place of flour works wonderfully without losing flavor.
For a vegan adaptation, I’ve experimented by substituting the butter with coconut oil and using flax eggs instead of chicken eggs, which still gives you a lovely texture. You could also try mixing in different types of chocolate—like dark chocolate chunks for a richer bite or white chocolate chips for a sweeter contrast. Another fun idea is to sprinkle some sea salt on top before baking, cooking it for a slightly shorter time for a molten center, or even baking it in individual tart pans for elegant single servings.
If you want to get creative with texture, try adding a swirl of peanut butter or Nutella before baking, or top the pie with marshmallows for a gooey, toasted finish. Baking times may vary slightly with these additions, so keep an eye on the pie as it bakes for best results.
Storage and Reheating
Storing Leftovers
I usually store any leftover Chocolate Chip Pie in an airtight container or wrap it tightly with plastic wrap to keep it fresh. Refrigeration is best, and it will stay delicious for up to 3 to 4 days. I find the flavors deepen after a day in the fridge, so leftovers can be even more enjoyable!
Freezing
This pie can definitely be frozen if you want to save it for later. I recommend wrapping the pie tightly in aluminum foil, then placing it in a freezer-safe container or heavy-duty freezer bag to protect it from freezer burn. It will keep well for up to 2 months. When you’re ready to enjoy it, thaw the pie overnight in the refrigerator for the best texture.
Reheating
To reheat, I gently warm individual slices in a microwave for about 20-30 seconds or place the whole pie in a preheated oven at 300°F for about 10-15 minutes. This helps restore the gooey texture of the filling without overcooking it. Avoid reheating for too long as it can dry out the pie and toughen the crust. Serving slightly warm really brings back that just-baked feeling that I love.
FAQs
Can I use a store-bought pie crust?
Absolutely! I often use store-bought pie crusts for convenience, and they work great with this recipe. Just make sure to chill the crust before baking to maintain its flakiness and prevent shrinking.
What if I don’t have nuts? Can I leave them out?
Yes, leaving out the nuts is perfectly fine and doesn’t affect the overall texture or flavor too much. The pie will still be rich and delicious—nuts are just a nice crunchy contrast if you like them.
Can I make this pie ahead of time?
You can prepare the pie a day in advance and refrigerate it after baking and cooling. Just let it come to room temperature or warm slightly before serving. This makes it an excellent choice for entertaining.
Is it possible to double this recipe for a larger crowd?
Yes, you can easily double the filling ingredients and make two pies. Just bake each pie separately to ensure even cooking and don’t overcrowd the oven. This way, you’ll have plenty to go around!
What’s the texture like—does it slice cleanly?
This pie has a custardy filling that sets nicely but stays soft, so use a sharp knife and cut gently. Allowing the pie to cool fully makes slicing much easier and the pieces hold together beautifully.
Conclusion
I genuinely hope you give this Chocolate Chip Pie Recipe a try because it’s one of those special desserts that never fails to bring smiles. It’s comforting, easy to make, and endlessly satisfying—perfect for both everyday indulgence and those memorable celebrations. Sharing this pie with the people I care about has brought me so much joy, and I’m excited for you to experience that same warmth and happiness with every delicious bite.