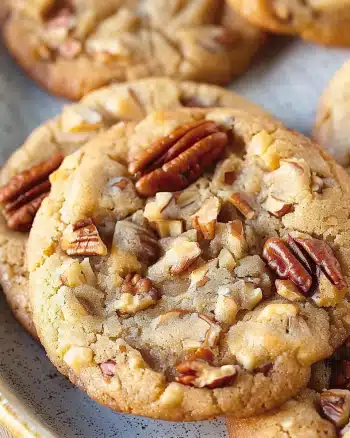
I absolutely love sharing this Crumbl Cookie Copycat Recipe because it brings that delightful, bakery-style cookie experience right into my own kitchen. Whenever I need a sweet treat that hits all the right notes—soft, chewy, buttery, and loaded with chocolate chips—this recipe never disappoints. It perfectly captures the essence of those famous Crumbl Cookies, yet it’s incredibly simple to make, which makes it a go-to for any cookie craving or special occasion.
Why You’ll Love This Crumbl Cookie Copycat Recipe
From the very first bite, I am hooked by the rich flavor profile this cookie delivers. The delicate balance of brown and granulated sugars creates a caramel-like sweetness that perfectly complements the melty chocolate chips. The hint of vanilla lends a warm, inviting aroma that fills my kitchen as these cookies bake. What sets these cookies apart for me is the texture—the combination of softness in the center with slightly crispy edges gives every bite such a satisfying contrast.
What makes this Crumbl Cookie Copycat Recipe truly special is how straightforward it is to prepare. I appreciate that, despite its professional-quality taste, it uses simple pantry staples and doesn’t require any complicated techniques. Plus, chilling the dough ahead of time allows the flavors to develop further and results in a more tender cookie. I love baking these for gatherings, birthdays, or even as a spontaneous treat because they impress every time. Honestly, once you make these cookies, they become a staple in your baking repertoire.
Ingredients You’ll Need

The beauty of this recipe lies in its simplicity—each ingredient is carefully chosen to build layers of flavor, texture, and that signature Crumbl cookie look. These essentials come together so beautifully to create a cookie that’s soft, chewy, and packed with gooey chocolate chips.
- Salted butter: Softened for that creamy base that guarantees tender, rich cookies.
- Brown sugar: Adds moisture and a subtle caramel hint for deep flavor.
- Granulated sugar: Balances sweetness and contributes to the slight crisp edges.
- Vanilla extract: Infuses the dough with aromatic warmth and depth.
- Large eggs: Bind everything together while helping with the cookie’s soft texture.
- All-purpose flour: The structure foundation for these perfect cookies.
- Cornstarch: A sneaky addition that enhances softness and tenderness.
- Baking powder: Provides gentle lift for a light crumb.
- Baking soda: Helps with browning and spread for a slightly chewy edge.
- Salt: Balances sweetness and intensifies flavors.
- Chocolate chips: The star of the show—gooey pockets of milk or semi-sweet chocolate everyone loves.
Directions
Step 1: Start by lining your cookie sheets with parchment paper. This little trick makes cleanup so easy and ensures your cookies don’t stick, which is a lifesaver!
Step 2: In a large mixing bowl, cream together the softened butter, brown sugar, and granulated sugar for at least 5 minutes. I like to scrape down the sides occasionally to ensure everything blends perfectly smooth. Then, add the vanilla extract and eggs, mixing for another two minutes until fully incorporated and luscious.
Step 3: In a separate bowl, whisk together the dry ingredients: all-purpose flour, cornstarch, baking powder, baking soda, and salt. This ensures the leavening agents and salt are evenly distributed throughout the dough.
Step 4: Gradually stir the dry ingredients into the wet mixture until everything comes together. Then gently fold in 2 cups of chocolate chips to make sure there’s chocolate in every bite.
Step 5: Scoop out about ½ cup of cookie dough for each cookie. Roll each scoop into a ball and gently press it down slightly. I like to add a couple of extra chocolate chips on top of each ball for that irresistible chocolate-studded look. Remember to space them well on your baking sheet—no more than six per pan to give them room to spread. Chill the dough for at least 1 hour, but if you can wait longer, up to 24 hours in the fridge really boosts the flavor.
Step 6: Preheat your oven to 375 degrees Fahrenheit. Bake the cookies for 15 minutes, then check them: they should be turning a lovely golden hue but without that shiny, underbaked look. Depending on your oven, they may need a few more minutes to reach perfection.
Step 7: Once out of the oven, let the cookies rest on the baking sheet for 15 minutes. This step is crucial for them to set up nicely without breaking apart. Afterward, transfer them to a wire rack to cool completely before decorating. If you’re feeling fancy, spread or pipe frosting on top for that extra bakery finish.
Servings and Timing
This recipe makes about 12 large, indulgent cookies—perfect for sharing or savoring across a few days. The prep time is around 20 minutes, but don’t forget to add at least 1 hour of chilling time for the dough to get those perfect textures and flavors. Baking takes roughly 15 minutes per batch. Counting all steps, including resting and cooling, you’re looking at about 1 hour and 25 minutes total from start to finish. It’s definitely worth every minute!
How to Serve This Crumbl Cookie Copycat Recipe

I often enjoy serving these cookies slightly warm, fresh from the oven when the chocolate chips are soft and melty—it’s such a comforting indulgence. For a more polished presentation, I like to cool them completely and add a swirl of vanilla or chocolate frosting on top, giving them that signature look and extra layer of sweetness. You can garnish with a sprinkle of flaky sea salt or even a pinch of cocoa powder to elevate them visually and taste-wise.
These cookies pair wonderfully with a cold glass of milk, but I’ve also found that a steaming cup of coffee or a frothy latte really complements the buttery, chocolaty flavors. For adult gatherings, a lightly chilled dessert wine like Moscato or a smooth coffee liqueur cocktail can be a unique twist. Whether for an afternoon pick-me-up, a weekend party, or a cozy night in, these cookies easily fit any occasion.
When plating, I usually keep the portions generous—these cookies are big but so soft that one per person feels just right. You can arrange them on a rustic wooden board or a simple white platter to let their golden color and chocolate chips shine. If you want to make a dessert tray, add some colorful sprinkles or fresh berries for contrast and an inviting display.
Variations
I love experimenting with this Crumbl Cookie Copycat Recipe because it adapts so well to different flavor profiles. For instance, swapping chocolate chips for white chocolate chunks or peanut butter chips gives the cookies a delightful new twist. You can even mix in some toasted nuts for crunch or swirl in caramel bits for extra gooey sweetness.
For those with dietary restrictions, I’ve successfully made these cookies gluten-free by using a 1-to-1 gluten-free baking flour blend and ensuring the cornstarch and other ingredients are certified gluten-free. Vegan modifications are also doable by replacing the butter with a solid vegan butter substitute and using flax eggs instead of chicken eggs. The texture changes slightly but they’re still deliciously soft and chewy.
If you’re in a hurry, you can skip the chilling step, but I highly recommend it for the best flavor and texture. Alternatively, if you prefer crispier cookies, bake them a minute or two longer and use slightly less butter. You can even try baking them as cookie bars in a pan for easy slicing and sharing.
Storage and Reheating
Storing Leftovers
After enjoying your fresh batch, I store leftover cookies in an airtight container at room temperature to maintain softness and freshness. I find they keep beautifully for up to 4-5 days this way. If I want to separate layers, I place a piece of parchment paper between cookies to avoid sticking or crumbling.
Freezing
If I plan ahead, I often freeze individual cookie dough balls before baking. I place them spaced out on a baking sheet, freeze until firm, then transfer to a resealable freezer bag. The dough keeps well for up to 3 months, and you can bake straight from frozen—just add a couple extra minutes to the baking time. Fully baked cookies freeze nicely too; just make sure to wrap them tightly or store in an airtight container to prevent freezer burn.
Reheating
To revive leftover baked cookies, I gently warm them in a 300-degree oven for about 5 minutes or use the microwave for 10-15 seconds if I’m short on time. This brings back the softness and that delicious melty chocolate feeling. Avoid overheating or reheating for too long, as this can dry them out or make them tough.
FAQs
Can I use regular unsalted butter instead of salted butter?
Absolutely! If you use unsalted butter, just add an extra ½ teaspoon of salt to the dry ingredients to keep that perfect balance of flavors. Salted butter is convenient, but unsalted lets you control the saltiness precisely.
Is chilling the dough really necessary?
While you can bake right after mixing, chilling the dough for at least an hour makes a big difference. It allows the butter to firm up and the flavors to meld, resulting in a thicker, chewier cookie with less spread. If you have the time, I highly recommend it.
Can I substitute chocolate chips for chunks or other mix-ins?
Yes! Chocolate chunks, white chocolate, peanut butter chips, or even dried fruits can substitute chocolate chips. Mixing different add-ins is a fun way to personalize the recipe, just keep the total quantity about the same.
How do I know when the cookies are perfectly baked?
Look for golden edges with a center that looks set but not shiny or wet. The cookies will firm up as they cool, so don’t overbake. If they seem underdone after 15 minutes, add a minute or two at a time. The goal is tender, not crispy or hard cookies.
Can I add frosting like Crumbl does?
Definitely! You can add a simple buttercream frosting once the cookies are completely cooled. Use a piping bag or spread it on with a knife for extra indulgence. It’s a fantastic way to match Crumbl’s style at home and impress friends and family.
Conclusion
I truly hope you give this Crumbl Cookie Copycat Recipe a try because it has become one of my absolute favorites to bake and share. It’s a recipe that brings joy, rich flavor, and that comforting homemade touch every time. Whether you’re baking for loved ones or treating yourself, these cookies never fail to make any moment sweeter. Happy baking!