I absolutely adore this Flourless Chocolate Cake with Raspberry Coulis Recipe because it combines the richest chocolate flavor with a luscious, velvety texture that melts in your mouth. Whenever I make this cake, I’m reminded how surprisingly simple it is to prepare despite its luxurious taste. The addition of raspberry coulis adds a bright, tangy contrast that perfectly balances the deep chocolate, making it my go-to dessert for special gatherings or when I want to treat myself.
Why You’ll Love This Flourless Chocolate Cake with Raspberry Coulis Recipe
What truly captivates me about this flourless chocolate cake is the incredible depth of flavor. The bittersweet chocolate paired with just the right amount of espresso creates a rich, intense taste that feels indulgent but never overwhelming. The cake’s texture is mesmerizingly smooth and dense, almost like a fudge but much lighter thanks to the whipped egg whites folded into the batter. Each bite feels like a little celebration in your mouth.
I also can’t emphasize enough how accessible this recipe is. There’s no flour to sift or complicated layers to assemble, which means less prep work and less clean-up. It’s perfect for when I want to impress guests or enjoy a sophisticated dessert without spending all day in the kitchen. Whenever I serve this cake, it’s met with rave reviews, making it an ideal choice for birthday dinners, holiday feasts, or even casual weekend treats.
Ingredients You’ll Need

The beauty of this recipe shines in its simplicity — every ingredient plays an essential role, from the bittersweet chocolate that delivers intense flavor to the eggs that give structure and lightness. The espresso enhances the chocolate’s complexity, while a little corn syrup in the glaze ensures that shiny, irresistible finish.
- Unsweetened cocoa powder (for dusting): Adds a subtle bitterness and prevents sticking while giving the cake a professional finish.
- Bittersweet chocolate (chopped): Provides a deep, rich chocolate flavor; I recommend 60–70% cocoa for the perfect balance.
- Butter (cut into pieces): Enhances the cake’s moist, silky texture and smooths out the batter.
- Egg yolks: Give body and richness to the cake batter.
- Granulated sugar (divided): Sweetens the cake just enough without overpowering the bittersweet notes.
- Espresso (or strong coffee): Intensifies the chocolate flavor with a subtle coffee aroma.
- Vanilla extract: Adds warm, sweet undertones that marry beautifully with chocolate.
- Salt: Balances all the sweetness and elevates the chocolate taste.
- Egg whites: Whipped to medium-firm peaks to lighten the dense chocolate mixture for a perfect texture.
- Corn syrup: Creates a glossy sheen for the chocolate glaze.
- Raspberry coulis (optional): Adds a vibrant, tart contrast that cuts through the richness of the cake.
Directions
Step 1: Preheat your oven to 300 degrees Fahrenheit. Prepare an 8-inch round cake pan by spraying it with nonstick spray, then lining it with parchment paper cut to size and sprayed as well. Dust the parchment with cocoa powder to ensure the cake releases easily after baking.
Step 2: Set up a double boiler by bringing water to a gentle simmer in a saucepan. Place a heatproof bowl on top, making sure it doesn’t touch the water. Add chopped bittersweet chocolate and butter to the bowl, stirring constantly until completely melted and smooth. Let it cool slightly.
Step 3: In a stand mixer fitted with the paddle attachment, beat together the egg yolks, 1/4 cup sugar, espresso, vanilla extract, and salt on medium-high speed until the mixture becomes pale and thick—this usually takes about 3-5 minutes.
Step 4: Gradually pour the cooled chocolate mixture into the yolk mixture, beating gently just until combined. Transfer this to a large mixing bowl and wash your mixer bowl to prepare for the egg whites.
Step 5: Using the whisk attachment, beat the egg whites at medium-high speed until foamy. Add the remaining 2 tablespoons of sugar gradually and continue beating until medium-firm peaks form—that means when you lift the whisk, the peaks hold their shape but aren’t stiff.
Step 6: Fold half of the whipped egg whites into the chocolate mixture gently to lighten it. Then fold in the remaining whites carefully, making sure there are no streaks but not overmixing to lose airiness.
Step 7: Pour the batter into your prepared pan, smoothing the top with a spatula. Bake for about 35 minutes or until the cake slightly puffs and a toothpick inserted in the center comes out very moist but not liquid—be careful not to overbake.
Step 8: Cool the cake on a wire rack for at least 30 minutes. Run a knife around the edges to loosen, invert onto a plate, and carefully peel off the parchment. Let it cool completely, then cover and refrigerate for at least 4 hours or overnight so the flavors set beautifully.
Step 9: To prepare the glaze, melt chopped chocolate and butter in a double boiler again until smooth. Remove from heat and whisk in corn syrup to create a glossy finish.
Step 10: Place the chilled cake on a wire rack over a baking sheet or large plate and pour the warm glaze slowly over the center. The glaze should spread evenly and spill over the sides.
Step 11: Refrigerate the cake until the glaze is firm, at least 2 hours. When ready to serve, use a thin, hot knife dipped in hot water and dried between each cut to slice the cake neatly. Serve with raspberry coulis if you like.
Servings and Timing
This Flourless Chocolate Cake with Raspberry Coulis Recipe yields about 12 generous servings—enough to satisfy a crowd or a family gathering. It requires roughly 15 minutes for prep time due to melting and mixing steps, followed by 35 minutes of baking. Adding cooling and chilling time, you should set aside a total of around 6 hours, including at least 4 hours for the cake to chill and set properly in the refrigerator. The glaze also needs at least 2 hours to firm up before serving.
How to Serve This Flourless Chocolate Cake with Raspberry Coulis Recipe

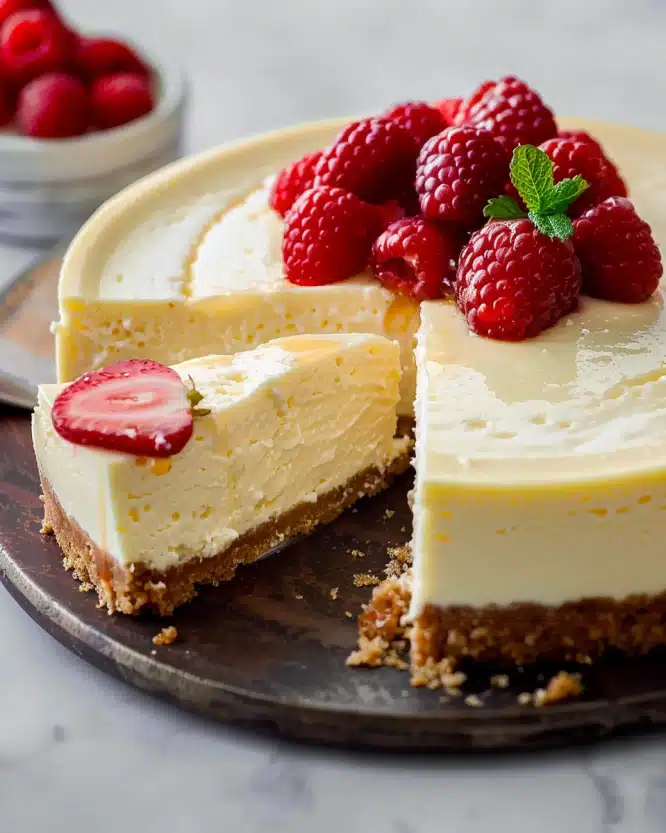
When I serve this cake, I love keeping things elegant yet simple. A small dollop of freshly whipped cream or a few ripe raspberries alongside really complement the intense chocolate and the tartness of the coulis. I find that the contrast between creamy and fruity adds another layer of experience to each bite.
For presentation, I usually place the cake on a decorative platter and drizzle a little extra raspberry coulis artistically around the edges. Garnishing with a sprig of fresh mint or a sprinkle of powdered sugar instantly elevates the look. If I’m serving this for a special occasion, I sometimes add edible gold leaf for a truly decadent touch.
This cake pairs beautifully with a robust coffee, a glass of rich red wine like a Cabernet Sauvignon or Merlot, or even a sparkling rosé if you’re in the mood to celebrate. For non-alcoholic choices, an intense espresso or a tart berry iced tea highlights the dessert’s nuanced flavors. I serve it chilled or at room temperature, depending on the season—chilled for hot days, room temperature for cooler nights.
Variations
I often experiment with this Flourless Chocolate Cake with Raspberry Coulis Recipe by swapping out bittersweet chocolate for dark or semi-sweet chocolate if I want a slightly different sweetness level. For an extra twist, adding a pinch of cinnamon or chili powder to the batter gives a subtle warmth that pairs surprisingly well with the raspberry coulis.
If you’re looking for dietary options, this cake is naturally gluten-free, which makes it great for guests with sensitivities. For a vegan version, I’ve played around with aquafaba (the liquid from canned chickpeas) as an egg white substitute, along with dairy-free chocolate and vegan butter alternatives. The texture shifts a bit, but the chocolate flavor remains absolutely divine.
Another fun variation is to swap the raspberry coulis for a salted caramel or orange sauce, depending on the season or your mood. You could also experiment by baking individual petite cakes in ramekins for a fancy presentation or even try a no-bake version that uses whipped cream folding techniques to maintain that silky texture.
Storage and Reheating
Storing Leftovers
After enjoying your cake, I always store any leftovers in an airtight container in the refrigerator. This helps preserve the cake’s moisture and keeps the glaze intact. Wrapped well, it will stay fresh for up to 4 days. I recommend slicing the cake before storing, so you can easily grab a portion without disturbing the entire cake.
Freezing
If you want to save the cake for longer, it freezes quite well. I suggest wrapping it tightly in plastic wrap, then placing it inside a sealed freezer-safe container or heavy-duty freezer bag to prevent freezer burn. Frozen, it stays good for up to 2 months. When ready to eat, thaw it overnight in the refrigerator to maintain its texture.
Reheating
I generally prefer to enjoy this cake straight from the fridge or at room temperature, but if you want to warm a slice slightly, gently reheat it in the microwave for 10-15 seconds on low power. Avoid overheating, as this can cause the chocolate to seize or the texture to become rubbery. The key is to warm just enough to soften the cake without melting the glaze entirely.
FAQs
Can I use milk chocolate instead of bittersweet chocolate?
While you can substitute milk chocolate, be aware that the cake will become much sweeter and less intense in flavor. Bittersweet or dark chocolate provides the ideal richness and depth that this cake is known for.
Why is it important not to overbake the cake?
This flourless cake relies on its moist, fudgy texture, which can easily turn dry and crumbly if overbaked. You want the center to remain very moist but set, so closely watch the time and test with a toothpick that comes out moist but not wet.
How do I make the raspberry coulis mentioned in the recipe?
I usually puree fresh or frozen raspberries with a bit of sugar and lemon juice, then strain through a fine sieve to remove the seeds. It’s a quick and vibrant sauce that brings a lovely tartness to balance the richness of the cake.
Can I prepare this cake in advance?
Absolutely! I recommend baking and chilling the cake a day ahead, then glazing it the day you intend to serve. This makes assembly easier and allows flavors to develop beautifully.
What if I don’t have espresso or coffee on hand?
If you don’t have espresso, you can substitute with strong brewed coffee or even omit it. The coffee enhances the chocolate flavor but is not essential to the cake’s success.
Conclusion
Honestly, I can’t recommend this Flourless Chocolate Cake with Raspberry Coulis Recipe enough. It’s one of those desserts that always feels special, no matter the occasion, yet it’s surprisingly straightforward to pull off. Whether you’re a chocolate lover or looking to wow your friends with an elegant, gluten-free treat, this recipe will quickly become a beloved staple. Give it a try—you won’t be disappointed!