I have to tell you, one of my absolute favorite indulgences is this Fried Ice Cream Recipe. It’s such a fun contrast of textures and flavors — the crispy, warm golden crust surrounding the chilly, velvety ice cream inside creates a little magic in every bite. Whenever I make this at home, it becomes the star of the show, perfect for surprising guests or treating myself after a long day. It’s surprisingly easy to pull together, but the end result is nothing short of spectacular. I’m so excited to share my version with you!
Why You’ll Love This Fried Ice Cream Recipe
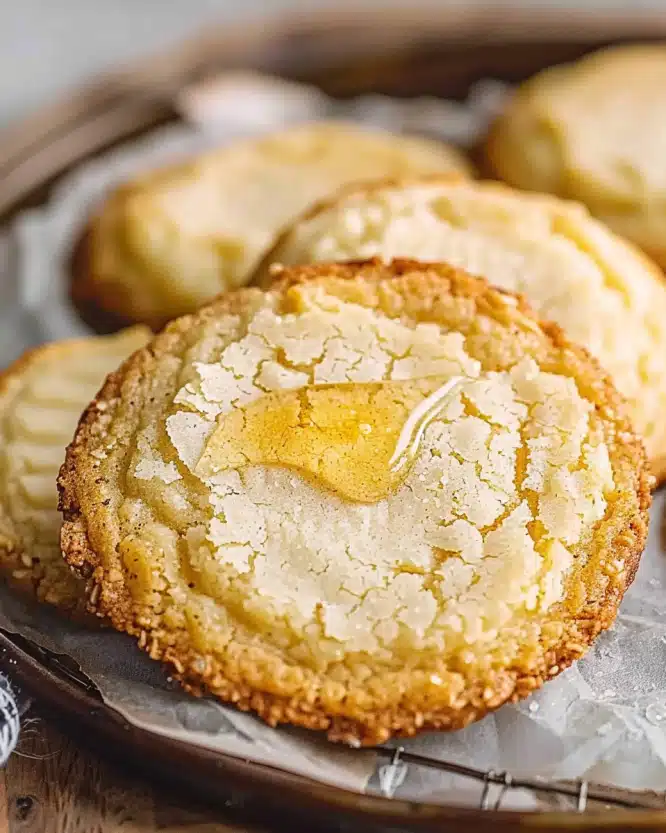
For me, the best part about this Fried Ice Cream Recipe is the blend of warm and cold sensations that come together flawlessly. The crushed corn flakes, lightly toasted with cinnamon and sugar, add the perfect crunch and subtle spice that complement the creamy vanilla ice cream beautifully. It’s like having the best of both worlds — a cozy, fragrant crispness with that cool, smooth sweetness inside. Every bite feels like a delightful surprise.
What makes this recipe especially appealing is how straightforward it is to make. I love desserts that don’t require hours of prep or complicated techniques, and here, the magic happens in just under 20 minutes, plus a little chilling time. It’s a fantastic choice for any occasion — whether you want a weekend treat, a festive dinner finale, or an unexpected dessert for your friends. I always find it stands out because it looks impressive and tastes like you spent hours crafting it, but it’s really quite simple.
Ingredients You’ll Need

The ingredients for this Fried Ice Cream Recipe are wonderfully simple but each one plays an essential role. From the creamy base to the crunchy coating, every component contributes a layer of flavor, texture, or color that makes the dish truly special.
- Vanilla ice cream: The star of the show that provides the smooth and creamy center.
- Butter: Used to toast and bind the corn flakes, adding richness and flavor.
- Corn flakes cereal (crushed): Gives that satisfying crunch and acts as the crispy coating.
- Ground cinnamon: Adds a warm, aromatic spice that makes the coating tantalizing.
- Granulated sugar: Sweetens the coating slightly and enhances caramelization when toasted.
- Chocolate sauce, whipped cream, and maraschino cherries (optional toppings): For extra indulgence and beautiful presentation.
Directions
Step 1: Scoop one cup of vanilla ice cream and quickly roll it into a ball using clean hands. Immediately place the ice cream ball on a plate in the freezer to keep it firm. Repeat this until you have four ice cream balls, and keep them chilled while you prepare the coating.
Step 2: Melt the butter in a large skillet over medium heat. Once melted, add the crushed corn flakes and ground cinnamon into the pan, stirring well to ensure every flake is coated with butter and cinnamon.
Step 3: Cook the corn flakes mixture, stirring constantly, until the cereal turns a light golden brown, which should take about 5 minutes. This toasting step really brings out the flavor and crunch. Remove the skillet from the heat and stir in the granulated sugar until evenly distributed.
Step 4: Transfer the corn flake mixture to a shallow dish and let it cool completely. This step is crucial so the coating will stick nicely to the ice cream without melting it.
Step 5: Once the mixture has cooled, take each ice cream ball and roll it thoroughly in the corn flake coating. Press gently so the coating adheres well and creates a nice, thick crust around each ball.
Step 6: Place the coated ice cream balls back on a clean plate and freeze for another 10 to 15 minutes, or until the crust is set and the inside is still hard. This chilling step ensures a perfect texture when you serve.
Step 7: Serve immediately, topping your fried ice cream with classic favorites like chocolate sauce, a dollop of whipped cream, and a bright maraschino cherry. Enjoy every crispy, creamy bite!
Servings and Timing
This Fried Ice Cream Recipe makes 4 generous servings, perfect for sharing with friends or family. The prep time is about 10 minutes for shaping the ice cream balls and toasting your coating, plus 5 minutes to cook the corn flakes. You’ll want to allow at least 10-15 minutes of freezer time after coating the ice cream to get that perfect crunch and temperature contrast. Altogether, the total time from start to serving clocks in around 20-25 minutes, which feels delightfully quick for such an elegant dessert.
How to Serve This Fried Ice Cream Recipe

I love serving this Fried Ice Cream Recipe right after freezing it, while the contrast between the crisp coating and the chilled ice cream inside is its most dramatic. For presentation, placing each ball on a pretty dessert plate with a drizzle of warm chocolate syrup looks stunning and adds a touch of extra indulgence. I like to pile on a swirl of freshly whipped cream and place a bright maraschino cherry on top for a classic flair.
For sides, you could serve fresh berries or a berry compote alongside the fried ice cream to add some freshness and a tart counterpoint to the sweetness. If you’re feeling festive, sprinkling some toasted nuts or coconut flakes over the top brings texture and flavor complexity. This dessert pairs beautifully with a light sparkling wine or a fruity cocktail, but it’s just as satisfying with a simple cup of coffee or iced tea.
I think this dish is perfect for special family dinners, holiday celebrations, or anytime you want to impress without spending hours in the kitchen. You can easily adjust portion sizes too – serving smaller balls makes a lovely appetizer dessert, while larger ones are indulgent enough for an after-dinner treat. And remember, you want to serve it immediately to enjoy the crispness before it melts!
Variations
I love mixing things up with this Fried Ice Cream Recipe depending on what I have on hand or dietary needs. You can swap vanilla ice cream for other flavors like chocolate, strawberry, or even melt-in-your-mouth coconut milk ice cream for a dairy-free vegan twist. Gluten-free eaters can simply use gluten-free corn flakes or crushed gluten-free cereal for the coating without losing that satisfying crunch.
For a spicy kick, sometimes I add a pinch of cayenne pepper or chili powder into the corn flake coating. It pairs surprisingly well with the sweet and creamy ice cream, offering a playful heat. Another idea is to experiment with the coating; crushed nuts, graham cracker crumbs, or even crushed pretzels add different textures and taste profiles. If you prefer not to toast in butter, you can try using coconut oil for a subtle tropical aroma.
While traditionally fried ice cream is cooked in hot oil briefly, I appreciate this skillet method because it’s simpler and less messy while still delivering that toasted, golden crust. If you have a deep fryer and want to go authentic, coating the ice cream balls well and quickly frying them can be a fun alternative once you’re comfortable with the process. Just be sure the ice cream stays frozen solid before frying to avoid melting.
Storage and Reheating
Storing Leftovers
Because this is a fresh, crunchy dessert best enjoyed immediately, it’s a bit tricky to store leftovers once assembled. If you happen to have any fried ice cream balls left, keep them in an airtight container in the freezer to preserve their texture and flavor. I recommend eating them within 1 to 2 days for the best experience, but note that the crisp coating may soften slightly over time.
Freezing
You can definitely freeze the individual ice cream balls after rolling but before coating for up to a week, which helps with prep ahead plans. Once coated and frozen, they keep best when airtight and well-wrapped to avoid freezer burn or absorption of other flavors. When you’re ready to serve, just add your toppings fresh.
Reheating
Since this dessert relies on the crunch of the coating and the cold of the ice cream, reheating isn’t really recommended. Avoid microwaving or oven heating, as it’ll melt the ice cream and soften the crust. Instead, I suggest enjoying the treats fresh after freezing — that’s when the magic happens!
FAQs
Can I make this Fried Ice Cream Recipe ahead of time?
Yes! You can prepare the ice cream balls and coat them, then freeze them for up to a few hours or even a day before serving. This helps reduce last-minute prep and makes hosting easier.
What type of ice cream is best for frying?
I find that firm, well-frozen vanilla ice cream works best because it holds its shape and contrasts deliciously with the crunchy coating. However, feel free to get creative with flavors once you’re comfortable with the method.
Can I use something other than corn flakes for the coating?
Absolutely. Crushed graham crackers, nuts, or gluten-free cereals are great alternatives that add different textures and flavors while still crisping nicely when toasted in butter and cinnamon.
Is this recipe safe to make if I don’t have a deep fryer?
Definitely! This version uses a skillet to toast the coating ingredients, avoiding the need for deep frying altogether, which makes it more approachable and less messy while still delivering fantastic flavor and crunch.
How do I prevent the ice cream from melting while coating?
Working quickly and keeping the ice cream balls well-frozen in the freezer before and after coating is key. Also, making sure the coating mixture has cooled completely helps avoid early melting.
Conclusion
If you’re craving a dessert that feels both elegant and fun, warm and cold, crunchy and creamy, this Fried Ice Cream Recipe is truly a winner in my book. It’s one of those dishes I love making for friends because it always surprises and delights, yet it’s simple enough to whip up on a whim. I hope you enjoy this recipe as much as I do — trust me, it’s a treat worth every bite!