I absolutely love sharing this Pickle-Brined Fried Chicken Wraps Recipe because it combines crispy, juicy chicken with the tangy kick of pickle brine in the most delightful way. The rich flavors and textures come together perfectly inside a warm tortilla, making it one of my all-time favorite meals to whip up for lunch or dinner. Trust me, once you try it, these wraps will become a regular request at your table.
Why You’ll Love This Pickle-Brined Fried Chicken Wraps Recipe
What really excites me about this recipe is the unique flavor profile that the pickle brine imparts to the chicken. The brine tenderizes the chicken and infuses it with a subtle, tangy zest that cuts through the crispy fried coating beautifully. Each bite pops with savory spices, a touch of heat if you swap in spicy pickle brine, and that satisfying crunch I just can’t resist. It feels indulgent without being heavy, which is a win-win in my book.
I also appreciate how straightforward this Pickle-Brined Fried Chicken Wraps Recipe is to make. The ingredients are simple and easy to find, and the method is hands-on but not fussy. It’s the kind of recipe that’s perfect for a casual weeknight meal but also impressive enough to serve at a weekend gathering. Whether I’m feeding family or hosting friends, these wraps always bring smiles and a little excitement to the table.
Ingredients You’ll Need

The ingredients for this recipe are simple but crucial to getting the perfect balance of flavor, texture, and color. Each one plays a role in building that crispy, juicy, and zesty wrap I love so much.
- Chicken tenderloins: These are tender and cook evenly, making them ideal for frying and wrapping.
- Dill pickle juice: The star of the brine, adding tanginess and tenderness to the chicken.
- High smoke point oil: Necessary for frying the chicken to golden perfection without burning.
- Buttermilk: Helps the flour coating stick and adds a subtle tanginess to the batter.
- Eggs: Bind the coating layers for that ideal crunch.
- All-purpose flour: The base for the crispy, flavorful coating.
- Garlic powder, onion powder, paprika, kosher salt, and black pepper: These spices create depth and enhance the savory coating.
- Flour tortillas: Soft and pliable, perfect for wrapping all the goodness inside.
- Ranch dressing: Creamy and cool, it balances the tangy chicken and fresh veggies.
- Shredded green leaf lettuce and sliced tomato: Add freshness, crunch, and color.
- Dill pickle slices: Reinforce the pickle flavor and add zesty bites in every wrap.
- Shredded cheddar cheese: Melts slightly to bring richness and a tangy sharpness.
Directions
Step 1: Place the chicken tenderloins in a shallow dish or a Ziploc bag. Pour the dill pickle juice over the chicken, making sure all pieces are submerged. Refrigerate for a minimum of 2 hours and up to 6 hours to let the flavors and tenderness develop fully.
Step 2: While the chicken is brining, I usually prepare the ranch dressing if you want to make it homemade (or use store-bought for convenience). Just whisk together the ingredients and chill it until you’re ready to assemble the wraps.
Step 3: When the brining time is up, heat your oil to 350 degrees Fahrenheit in a deep-fat fryer or a cast-iron skillet with enough oil to submerge the chicken pieces about three inches deep. This ensures even frying and the perfect golden crust.
Step 4: In a bowl, whisk the buttermilk and eggs together thoroughly. In another shallow dish, combine the flour, garlic powder, onion powder, paprika, kosher salt, and black pepper.
Step 5: Remove the chicken from the brine, letting excess liquid drip off (but don’t pat dry, or the coating won’t stick as well). Take each piece and dredge it first in the seasoned flour, then dip into the buttermilk-egg mixture, and dust once again with the flour coating. This double-dip method creates an ultra-crispy crust that I just adore.
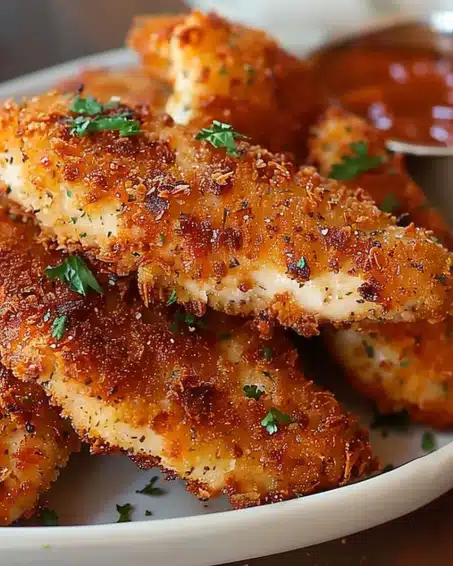
Step 6: Carefully place the coated chicken into the hot oil and fry for about 5 minutes, turning as needed, until golden brown and cooked through (internal temperature should reach 165°F). Transfer to a paper towel-lined plate to drain any excess oil.
Step 7: Once fried, slice the chicken into smaller, wrap-friendly pieces if you like. Warm the tortillas briefly before assembling to make folding easier.
Step 8: To assemble each wrap, lay a tortilla flat and spread about 2 tablespoons of ranch dressing. Layer on 1/2 cup shredded green leaf lettuce, a few slices of tomato, 4 dill pickle slices, the fried chicken pieces, and top with 1/4 cup shredded cheddar cheese. Fold the tortilla into a burrito shape and serve immediately while warm.
Servings and Timing
This Pickle-Brined Fried Chicken Wraps Recipe makes about 4 hearty servings, perfect for a family meal or sharing with friends. Prep time ranges from 10 to 15 minutes plus 2 to 6 hours of brining — I usually opt for around 3 hours to let that flavor really develop without the wait. The actual cook time for frying is just about 10 minutes total, and assembly takes another 5 minutes. Altogether, you’re looking at under 40 minutes active cooking and prep time, plus the brining window.
How to Serve This Pickle-Brined Fried Chicken Wraps Recipe

I love serving these wraps warm, right after assembly, so that little bit of cheddar is perfectly melty and the chicken remains crisp. They work beautifully with classic sides like crispy fries or a fresh, tangy coleslaw for added crunch and color contrast. For something lighter, a simple cucumber salad or even some pickled vegetables can enhance the pickle notes in the chicken.
When it comes to garnishing, I like to add a sprinkle of finely chopped fresh herbs like parsley or chives on top of the wrap just before serving for a pop of color and a hint of freshness. If you want to elevate the presentation, cut the wraps diagonally and arrange them neatly on a platter with extra ranch dressing or a spicy aioli for dipping — it’s always a crowd-pleaser at parties or casual get-togethers.
As for beverages, I find that a crisp lager or a light, citrusy white wine pairs beautifully with the tangy fried chicken flavors. For non-alcoholic options, a sparkling lemonade or an iced tea with a splash of lemon hits the spot. These wraps truly shine during casual dinners, game nights, or even weekend lunches, and they’re a perfect fit for family meals because everyone can customize their own wrap exactly how they like it.
Variations
One of the things I adore about this Pickle-Brined Fried Chicken Wraps Recipe is how flexible it is to tweak according to your tastes or dietary needs. If you want to switch up the protein, chicken thighs work beautifully — they stay juicy and have a richer flavor. Or try spicy pickle juice made with hot sauce for a bold twist that adds some heat without overpowering the other flavors.
For anyone needing gluten-free options, substituting the all-purpose flour with a gluten-free blend works well, and you can find gluten-free tortillas to keep the wrap authentic and accessible. Vegans can experiment by using plant-based “chicken” tenders and a vegan ranch dressing to get a similar experience, though the frying and brining time might need slight adjustments.
Sometimes I like to bake the chicken instead of frying it, especially for a lighter version — just coat the chicken as directed, place it on a wire rack over a baking sheet, and bake at 425°F for about 20 minutes until crisp. This method saves on oil but retains that wonderful seasoning and crispy texture I crave. You can also customize the toppings and add sliced avocado, pickled onions, or even a dash of hot sauce inside the wrap to tailor it to your personal cravings.
Storage and Reheating
Storing Leftovers
If you happen to have any wraps leftover, I recommend storing the components separately if possible—the fried chicken should be kept in an airtight container in the fridge and will stay good for up to 3 days. Tortillas and fresh veggies are best stored separately to keep them from getting soggy. If storing assembled wraps, wrap them tightly in plastic wrap or foil to maintain freshness but enjoy them within 24 hours for the best texture.
Freezing
The fried chicken part of the recipe freezes very well, which is great for meal prep. Let the chicken cool completely, then place portions in freezer-safe bags or containers with parchment paper between layers so they don’t stick. They can be frozen for up to 2 months. I don’t recommend freezing the full assembled wrap because the veggies and ranch dressing don’t reheat well after freezing.
Reheating
To reheat leftover chicken, I find the oven or an air fryer works best to bring back that crispiness. Heat at 375°F for about 10 minutes, flipping halfway through until the chicken is hot and crunchy again. Avoid microwaving if you want to keep it crispy, but if time is tight, cover the chicken loosely and microwave in short bursts, then finish with a quick toast in a hot pan. When ready, reassemble your wrap with fresh crisp veggies and the dressing for maximum flavor and texture.
FAQs
Can I use regular vinegar instead of pickle juice for the brine?
While you can experiment with vinegar, I highly recommend using dill pickle juice because it provides a unique blend of sourness, saltiness, and spices that vinegar alone doesn’t offer. The pickle juice flavor is a key part of what makes this recipe so special.
How spicy can this recipe get if I want to add heat?
Great question! You can swap part or all of the dill pickle juice for spicy pickle juice or add a tablespoon of your favorite hot sauce (like Frank’s RedHot) to the brine. This adds a gentle heat that balances perfectly with the crispy coating and creamy ranch.
Is it okay to brine the chicken overnight?
It’s best to brine the chicken for no more than 6 hours — brining overnight can make the chicken too salty and affect its texture, making it slightly mushy. I usually stick to 2 to 4 hours for the perfect balance.
Can I prepare this recipe gluten-free?
Absolutely! Use a gluten-free flour blend to dredge the chicken and make sure to pick gluten-free tortillas, ranch dressing, and seasoning blends. The recipe adapts nicely without losing that delicious crunch or flavor.
What if I don’t have an air fryer or deep fryer for frying the chicken?
No worries! You can shallow fry the chicken in a large skillet with at least an inch of oil, or bake it as described earlier. Baking produces a slightly different texture but still delivers great flavor with less hassle.
Conclusion
I hope you feel as excited as I do to try this Pickle-Brined Fried Chicken Wraps Recipe. It’s one of those dishes that sparks joy with every bite because of its crispy, tangy, and comforting essence wrapped up perfectly in a soft tortilla. Give it a go soon — I promise it will become a delicious staple you’ll love sharing with your family and friends just as much as I do!