I have to tell you about a dish that completely blew me away the first time I made it: Viral Baked Sushi with Spicy Kani Salad Recipe. It’s like everything I love about sushi—creamy, spicy, savory flavors—conveniently layered in a warm casserole that you can scoop onto crispy seaweed squares. I was hooked immediately by how easy it was to assemble, and how it brings an interactive, fun vibe to any meal. This recipe has quickly become a favorite for casual dinners and parties alike, and I’m so excited to share all the details with you.
Why You’ll Love This Viral Baked Sushi with Spicy Kani Salad Recipe
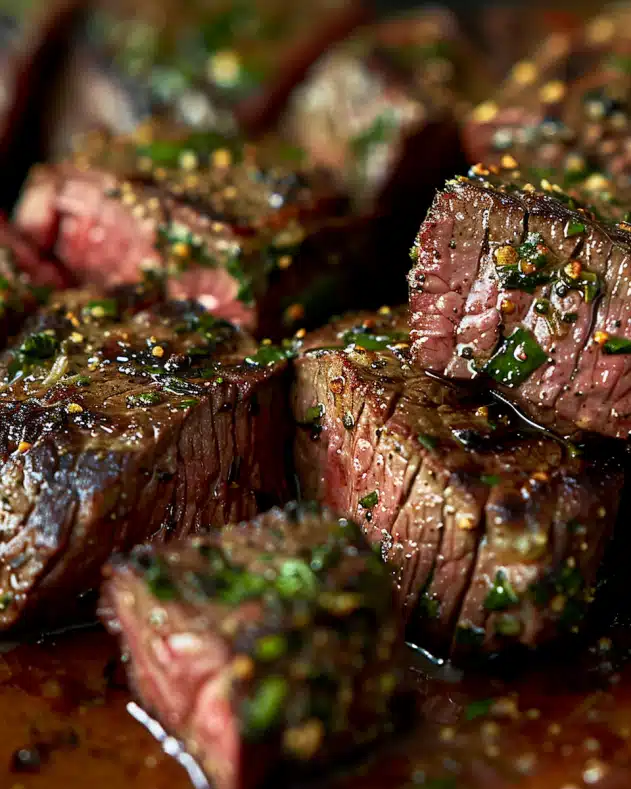
What I adore most about this recipe is its incredible balance of flavors and textures. The sushi rice forms a slightly sticky base that’s infused with sesame seeds and furikake, giving it that playful umami crunch. Then comes the spicy kani salad—a mix of creamy Kewpie mayo, fiery Sriracha, and sweet tobiko—that’s bursting with fresh scallion brightness and a little oceanic pop. The whole dish is like a perfectly layered, warm sushi roll that’s so comforting yet exciting.
From a practical perspective, this recipe couldn’t be easier to prepare. I love that once you cook the rice and shred the kani, it’s mostly just layering and popping it into the oven for 15 minutes. It’s a great crowd-pleaser because you can prepare it ahead of time and bake just before serving. Whether it’s a fun weeknight meal or a party appetizer, it always impresses without demanding hours in the kitchen. Plus, everything presses into a dish making serving effortless and mess-free.
Ingredients You’ll Need

All the ingredients in this Viral Baked Sushi with Spicy Kani Salad Recipe are pretty straightforward, but they’re essential for creating the perfect taste and texture balance. Each component brings its own magic, from the nutty sesame seeds to the spicy mayo that ties it all together.
- 5½ cups cooked sushi rice: This sticky rice base is the heart of the dish, providing the perfect foundation to hold all the flavors.
- 1 Tbsp toasted sesame seeds: Adds a subtle nutty crunch and depth to the rice layer.
- 1 Tbsp furikake, plus 1 tsp: This Japanese seasoning blends seaweed, sesame, and salt, boosting umami with every bite.
- 2 small squares of nori: Crumbled into the rice for that classic seaweed taste.
- 1 lb kani (imitation crab): Shredded or chopped small, it’s the creamy and slightly sweet star protein in the spicy salad layer.
- ⅓ cup Kewpie mayo: This rich Japanese mayo brings creaminess and a touch of umami.
- 1 Tbsp Sriracha: Adds the perfect spicy kick that wakes up all the flavors.
- 3 scallions: Thinly sliced for a fresh bite and green color contrast.
- ¼ cup tobiko or masago, divided: Those tiny fish eggs provide pops of texture and briny flavor.
- For serving: thinly sliced cucumbers, avocado, and seaweed squares: They add crunch, creaminess, and make it easy to scoop and assemble each bite.
Directions
Step 1: Preheat your oven to 400°F (205°C). Lightly grease a 9×13 baking dish with nonstick cooking spray to prevent sticking and ensure easy cleanup.
Step 2: Spread the cooked sushi rice evenly in the prepared baking dish. Press it down gently to create a smooth, compact layer. Sprinkle 1 tablespoon of toasted sesame seeds, 1 tablespoon furikake, and crumble the two small nori squares evenly over the rice. This layering gives the rice extra flavor and texture.
Step 3: In a medium bowl, combine the shredded kani with ⅓ cup Kewpie mayo, 1 tablespoon Sriracha, thinly sliced scallions, and 2 tablespoons of tobiko. Mix everything together so the kani is coated thoroughly with the spicy mayo.
Step 4: Spread the kani salad mixture evenly over the rice layer in the baking dish. Smooth it out with a spatula for an even finish, then sprinkle the additional 1 teaspoon of furikake on top to amp up the seasoning before baking.
Step 5: Bake the sushi casserole in the preheated oven for 15 minutes, or until it’s warmed through and the edges start to bubble slightly. This heating melds the flavors and warms the creamy kani topping perfectly.
Step 6: Once baked, remove from the oven and immediately drizzle generously with more Kewpie mayo and Sriracha, either separately or mixed together for a spicy mayo drizzle. Scatter an extra 1-2 tablespoons of tobiko on top, then finish with thin slices of cucumber and avocado. Serve hot, ideally with crisp seaweed squares for scooping.
Servings and Timing
This Viral Baked Sushi with Spicy Kani Salad Recipe serves about 8 people, making it ideal for gatherings or family dinners. Prep time is roughly 15 minutes, mostly for cooking the rice and assembling the kani salad. The bake time is around 15 minutes, and after that, you’ll want to let it cool for about 5 minutes to make serving easy without losing warmth. In total, from start to finish, you’re looking at just over an hour including active and inactive time.
How to Serve This Viral Baked Sushi with Spicy Kani Salad Recipe

When I serve this baked sushi, I love pairing it with sides that complement its creamy, spicy, and fresh flavor profile. For example, crisp pickled ginger or lightly dressed seaweed salad are perfect companions, adding brightness and crunch. I also like offering extra nori squares so guests can scoop up perfect little bites, making the meal interactive and fun to eat.
To present it beautifully, I drizzle the spicy mayo in a zigzag pattern and scatter colorful tobiko on top alongside thin cucumber and avocado slices. It creates a restaurant-quality look that instantly elevates the dish. For beverage pairing, a light, crisp white wine—like Sauvignon Blanc—or a refreshing Japanese beer complements the sweet and spicy notes really well, but iced green tea works wonderfully for a non-alcoholic option.
This recipe shines for weekend parties, casual dinners, or even holiday gatherings when you want something both familiar and unique. I always recommend serving it warm, as it’s the temperature that brings out the best creamy texture and deep flavor. Portion-wise, a couple of scoops per person alongside small sides feels just right to keep everyone satisfied without feeling too heavy.
Variations
I really enjoy experimenting with this recipe to suit different tastes and dietary needs. For example, you can swap out the kani for cooked shrimp or real crab if you want a more authentic seafood experience. Miso-glazed salmon or scallops are other fantastic upgrades if you’re in the mood for something a bit more indulgent.
If you need it to be gluten-free, just ensure your furikake and sauces are gluten-free brands—most Kewpie mayo and Sriracha are naturally gluten-free but always check the labels. Veganizing it takes a bit more creativity; I’ve tried mixing shredded king oyster mushrooms or hearts of palm for texture, combined with a vegan mayo and vegan tobiko alternatives.
For flavor tweaks, I sometimes add a touch of eel sauce (unagi) drizzle instead of or alongside spicy mayo for that sweet-savory contrast that’s irresistible. Another fun idea is to grill the baked sushi slightly at the end under the broiler for a minute or two to get a golden, slightly crispy top layer that adds another dimension.
Storage and Reheating
Storing Leftovers
When I’ve had leftovers, I store them in an airtight container to keep the flavors fresh and prevent the rice from drying out. I use a shallow glass or BPA-free plastic container that seals tightly. Leftovers stay good in the fridge for up to 3 days. I always try to consume them within that window to keep the kani salad fresh and avoid soggy textures.
Freezing
I generally don’t recommend freezing this dish because both the rice and kani salad don’t freeze well—they can become mushy and lose texture after thawing. The mayo and tobiko don’t hold up either. It’s best to enjoy it fresh or refrigerated, and if you want to plan ahead, you can prep the components separately but assemble and bake just before serving.
Reheating
For reheating, I find it’s best to use a moderate oven temperature around 325°F (165°C) for 10 to 15 minutes. This helps warm up the casserole evenly without drying it out. Avoid using the microwave if possible, as it tends to make the rice tough and the kani mixture oily. Once heated, add fresh garnishes and drizzle with a little mayo and Sriracha again to refresh the flavors.
FAQs
Can I make this recipe ahead of time?
Absolutely! You can prepare the sushi rice and kani salad layers separately in advance and assemble the casserole just before baking. This makes it a perfect dish for entertaining or busy weeknights. Keep everything refrigerated and bake within 24 hours for best freshness.
Is imitation crab (kani) the only seafood option for this recipe?
Not at all! While kani is traditional and affordable, I love mixing it up with cooked shrimp, crab meat, or even salmon. Just be sure any seafood you use is diced small and mixed well with the mayo for that signature creamy texture.
What can I use instead of furikake?
If you can’t find furikake, a combination of toasted sesame seeds and a little seaweed flakes or dulse flakes works well as a substitute. You can also sprinkle light salt and pepper with a tiny pinch of sugar to mimic the balance of flavors.
Can this recipe be made gluten-free?
Yes! Most ingredients are naturally gluten-free, but you should double-check your furikake and soy-based products like Sriracha. Many brands offer gluten-free versions that keep this dish totally safe and delicious.
How spicy is this recipe, and can I adjust the heat?
The heat level is moderate due to the Sriracha in the kani salad and additional spicy mayo drizzle. You can easily adjust it by reducing the Sriracha or omitting the spicy mayo for a milder version, or add more if you like it fiery. It’s best to personalize to your spice tolerance!
Conclusion
Honestly, I can’t recommend trying this Viral Baked Sushi with Spicy Kani Salad Recipe enough. It’s a delicious, unique twist on classic sushi that’s surprisingly simple to prepare and a total crowd-pleaser. Whether you’re making it for family dinner or to impress friends at your next gathering, it brings warmth, spice, and so much fun to the table. Give it a go—I promise it’ll become one of your go-to recipes before long!